How to Setup FAQ using Advanced Custom Fields (ACF) Repeater Field?
An amazing feature of the FAQ module is to fetch the data using the ACF’s Repeater Field. Setting up the FAQ using ACF is a little bit trickier. Let us see how it is done.
1. Create an ACF Repeater Field
Note: ACF Repeater Field option is available in the ACF’s Pro version only.
Step 1.1: Go to WordPress Dashboard > Custom Fields > Add New
Step 2.1: Fill in all the details and select the Field Type as Repeater
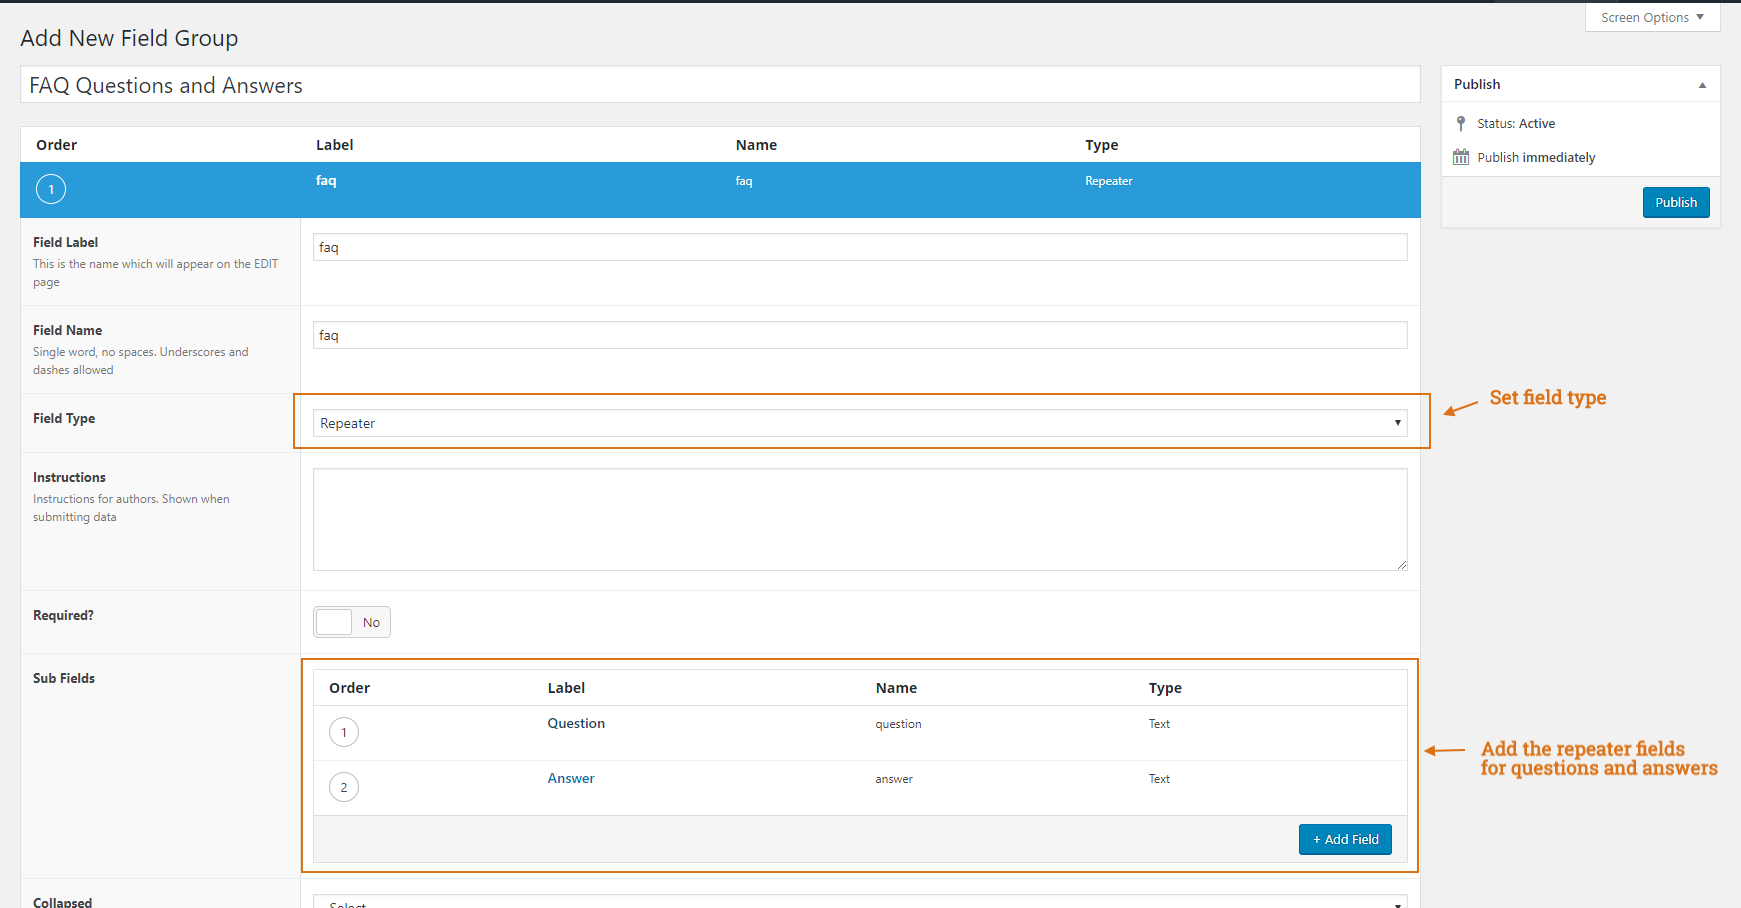
Step 3.1: Set the page/template/post type where you would like to add the FAQ fields.

Step 4.1: Publish the new ACF fields.
2. Adding Data to the ACF Field
The next step is to add the FAQ data to the ACF field.
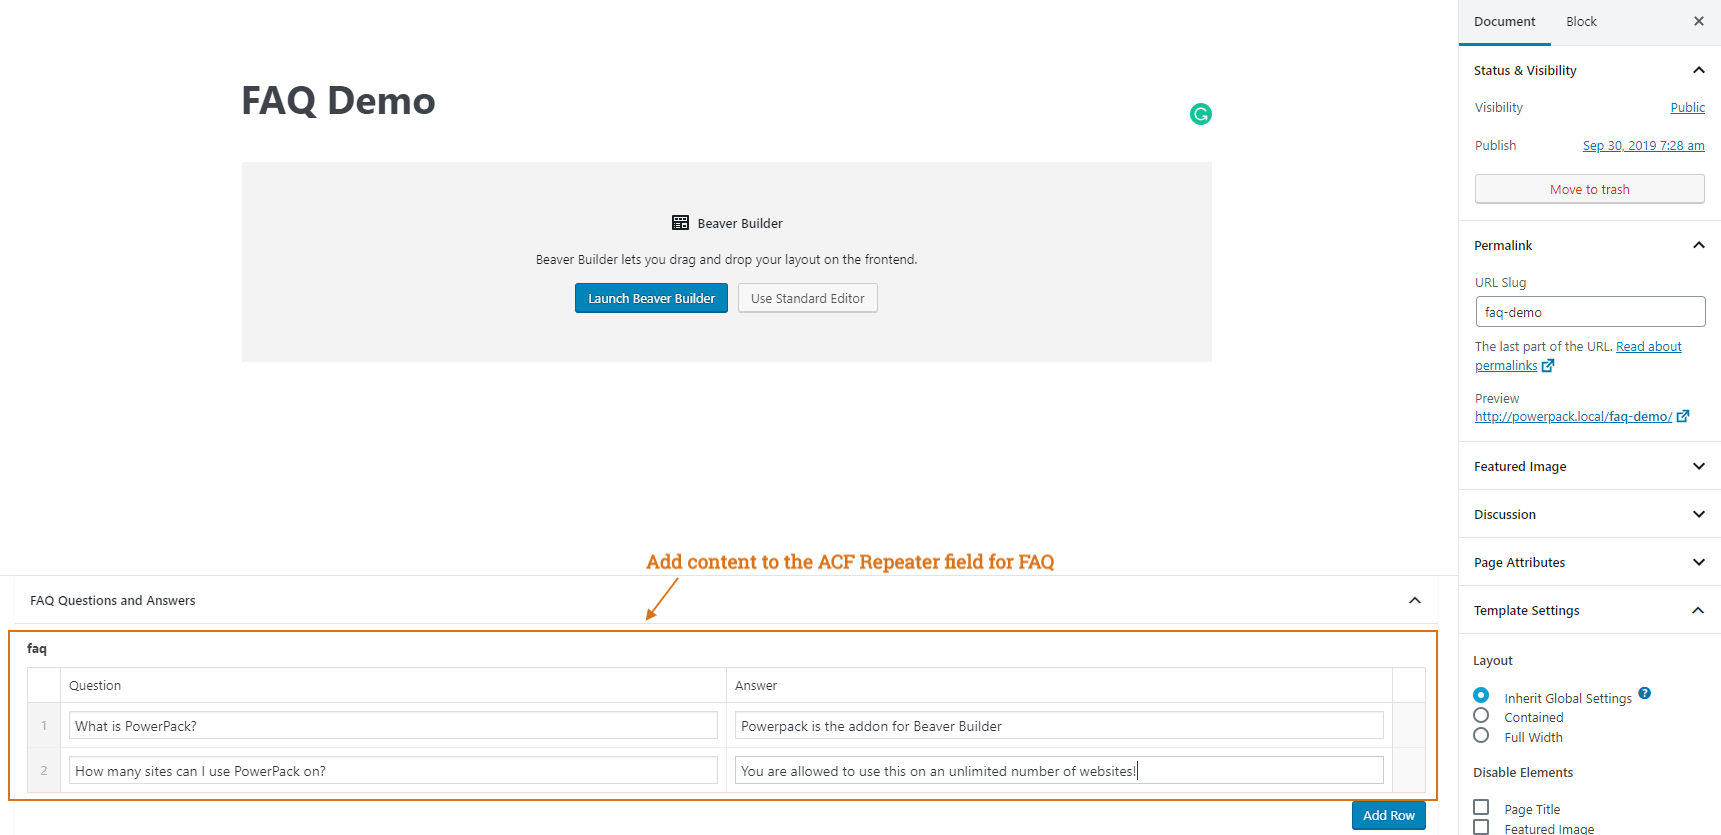
Step 2.1: Go to the page you set in the field display condition. If you’ve selected all the posts/pages then go the page for which you want to add the FAQ data.
Step 2.2: Add the details to the fields and once done click publish to save the data.
3. Displaying the FAQ module on the page
Step 3.1: After completing the first two steps open the page in the Beaver Builder editor.
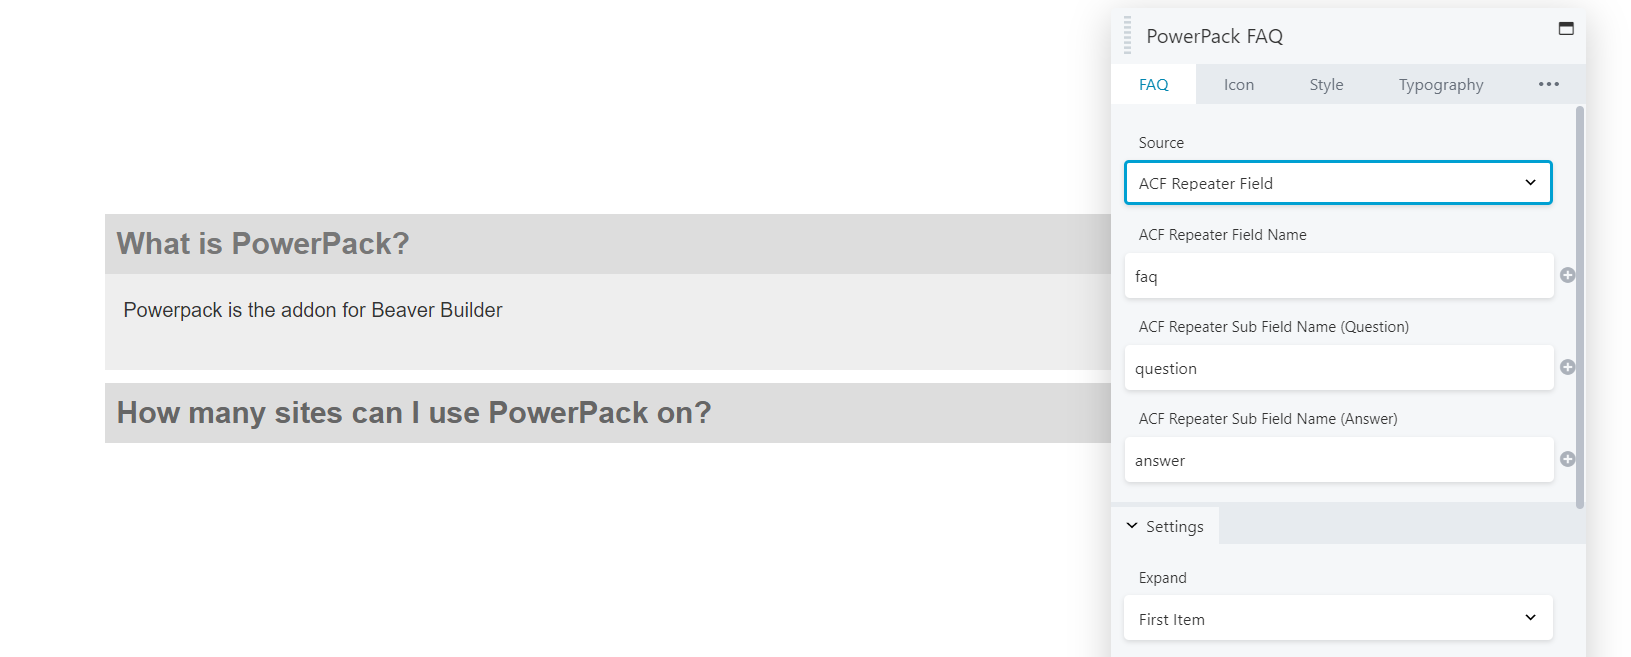
Step 3.2: Drag the FAQ module on the page and set Source > ACF.
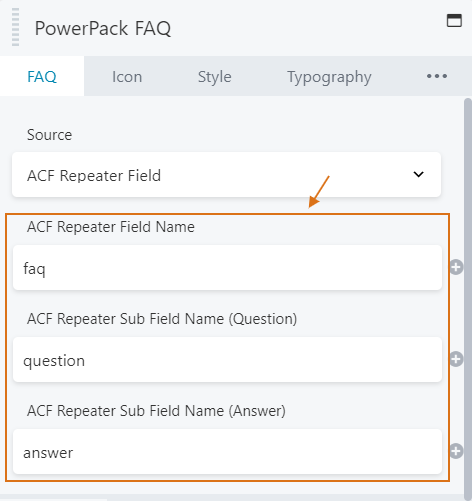
Step 3.3: Add the following ACF information to the fields
- ACF Repeater Field Name: Add the name of the Repeater Field. In our demo/example, we have used faq (as you can see in the screenshot below).
- ACF Repeater Sub Field Name (Question): Add the name of the question field added inside the repeater field.
- In our demo/example, we have used question (as you can see in the screenshot below).
- ACF Repeater Sub Field Name (Answer): Add the name of the question field added inside the repeater field.
- In our demo/example, we have used answer (as you can see in the screenshot below).
Step 3.4: After successfully adding the field names save the module and the Q & A content should now be visible in the module.
Step 3.5: Style the module as per the design needs.