How to Setup Full Screen Overlay Menu with Advanced Menu Module?
To set up the Full-Screen Overlay Menu for your website, follow the steps given below
Step 1: Launch the Beaver Builder for the respective page.
Step 2: When in the builder, drag and drop the Advanced Menu from the panel.
Step 3: As soon as you do that, you will see the Menu settings pop up.

Step 4: In the General tab, at the bottom, you will see the Menu Type option under the Responsive section; choose Full-Screen Overlay.
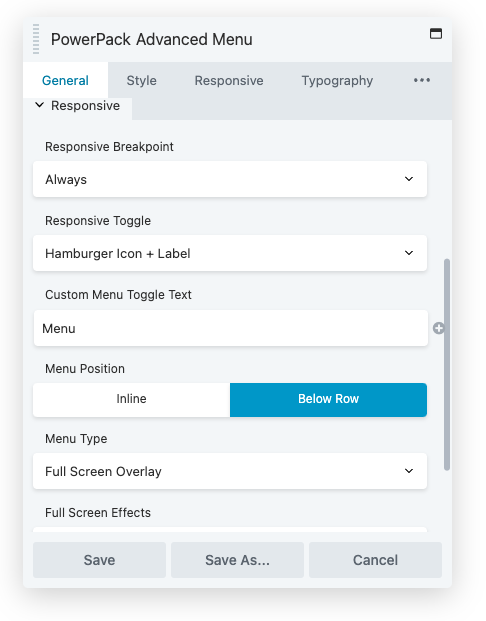
Step 5: Set the Responsive Breakpoint to Always; this will make the Menu appear on desktop devices as well.
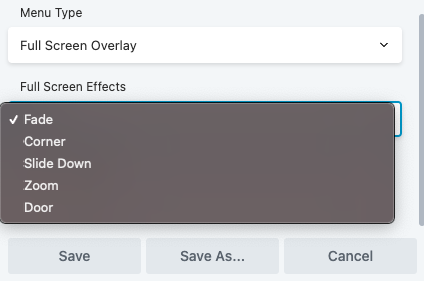
Step 6: You can choose the full-screen menu entrance effect.
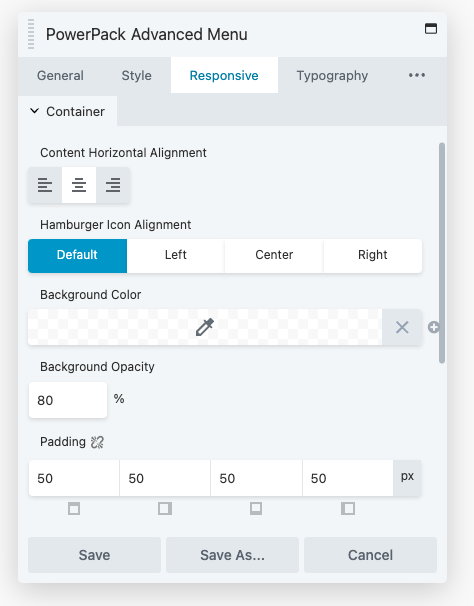
Step 7: Customize the container background color, opacity, spacing, etc, under the Responsive tab.
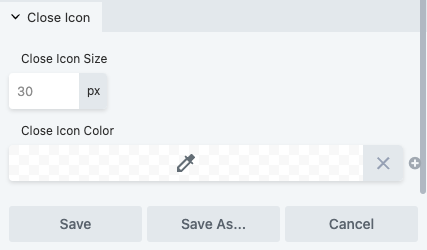
Step 8: You can also customize the close button size and color under the Responsive tab.