How to Create Custom Header Layout with PowerPack & Beaver Builder?
Headers have become a necessary part of the sites. A good header gives the site a clean look and a good user experience. Until now, creating a Header with Beaver Builder was dependent upon the use of Beaver Themer but with PowerPack’s Header/Footer option, you can add a custom Header to the site in a few simple steps.
1. Publish a new template named Header (for easy identification) taxonomically under WP-admin > Beaver Builder > Templates and edit it using Beaver Builder.

2. Once in the editor, you have two options to design a Header:
- Design a new Header from scratch using Beaver Builder
- or use PowerPack’s pre-built Header Templates to add a professionally designed Header layout to the page easily. For this, navigate to PowerPack settings > Templates > Row Templates and activate Header templates.
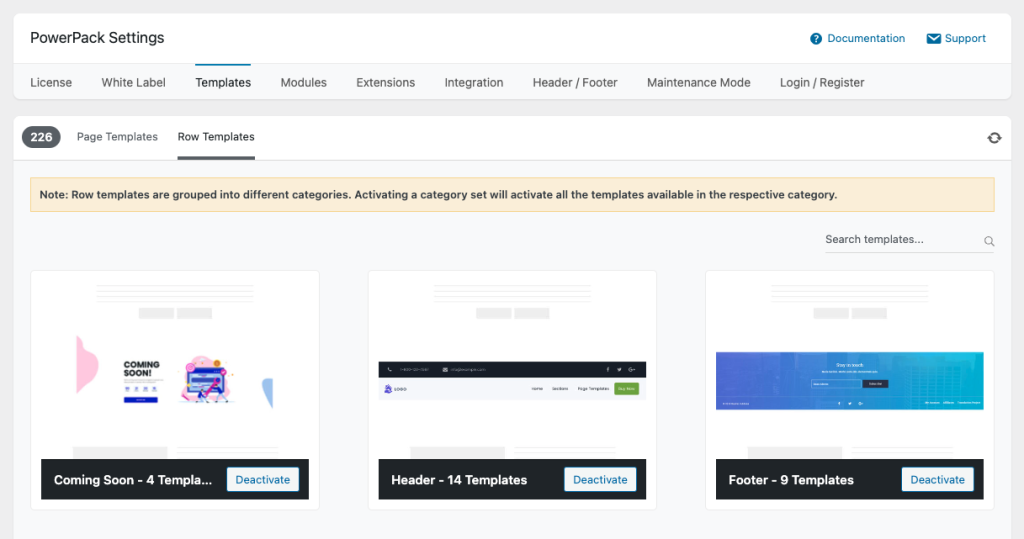
- Once you activate the Header templates, you will find them in the builder.
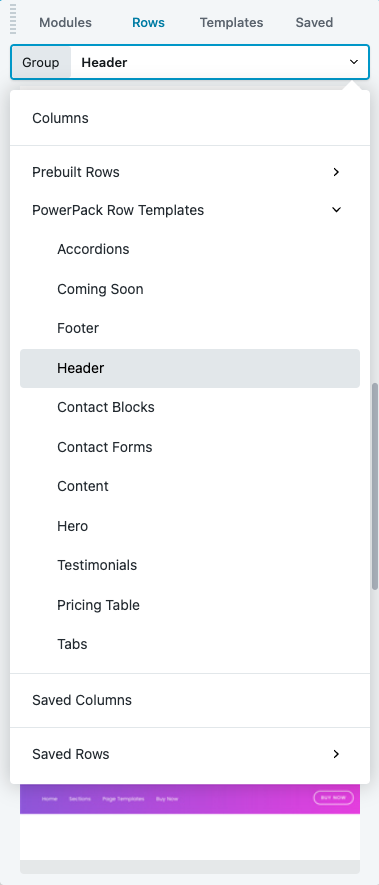
- Choose your desired template and customize it accordingly if needed.
3. Once done with the design, just publish the template.
4. Now go to the WP Dashboard > Settings > PowerPack > Header/Footer and set the template you created.
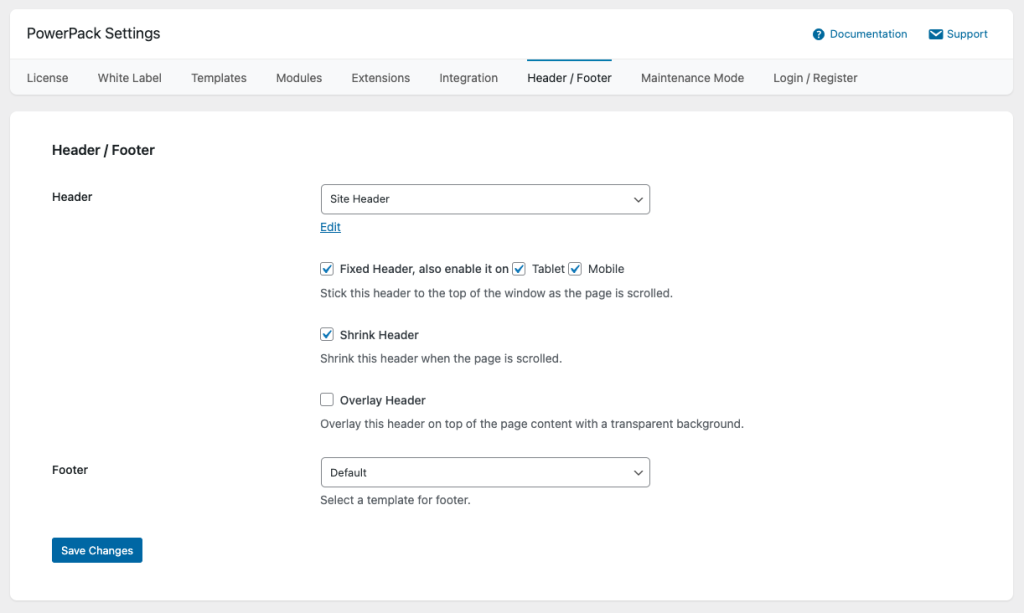
Here you can also make the header sticky and shrink on scroll by configuring these options shown in the screenshot above.
5. Save the settings and the Header will appear on the entire site.
