How to Setup WooCommerce Store page with WooPack?
Last updated May 14, 2019 · Yashwardhan Rana

Having an aesthetic store page is one of the essential things of your Digital store. Your products must be arranged aesthetically and appealingly on the products page so that the users can quickly scan through them and select the one they want.
Although WooCommerce comes with many customization options, it does lack somewhere when it comes to designing. However, now, it is taken care of as well.
With WooPack Wocommerce Modules for Beaver Builder, you can design multiple aspects of a WooCommerce shop with simple drag and drop operation.
In this article, we will learn how to set up a WooCommerce Store page with WooPack.
The Ingredients for this recipe:
Make sure you have the following plugins installed and active on your site:
Let’s begin!
WooCommerce Store Page with Beaver Builder
Step 1: Adding a new Theme Layout
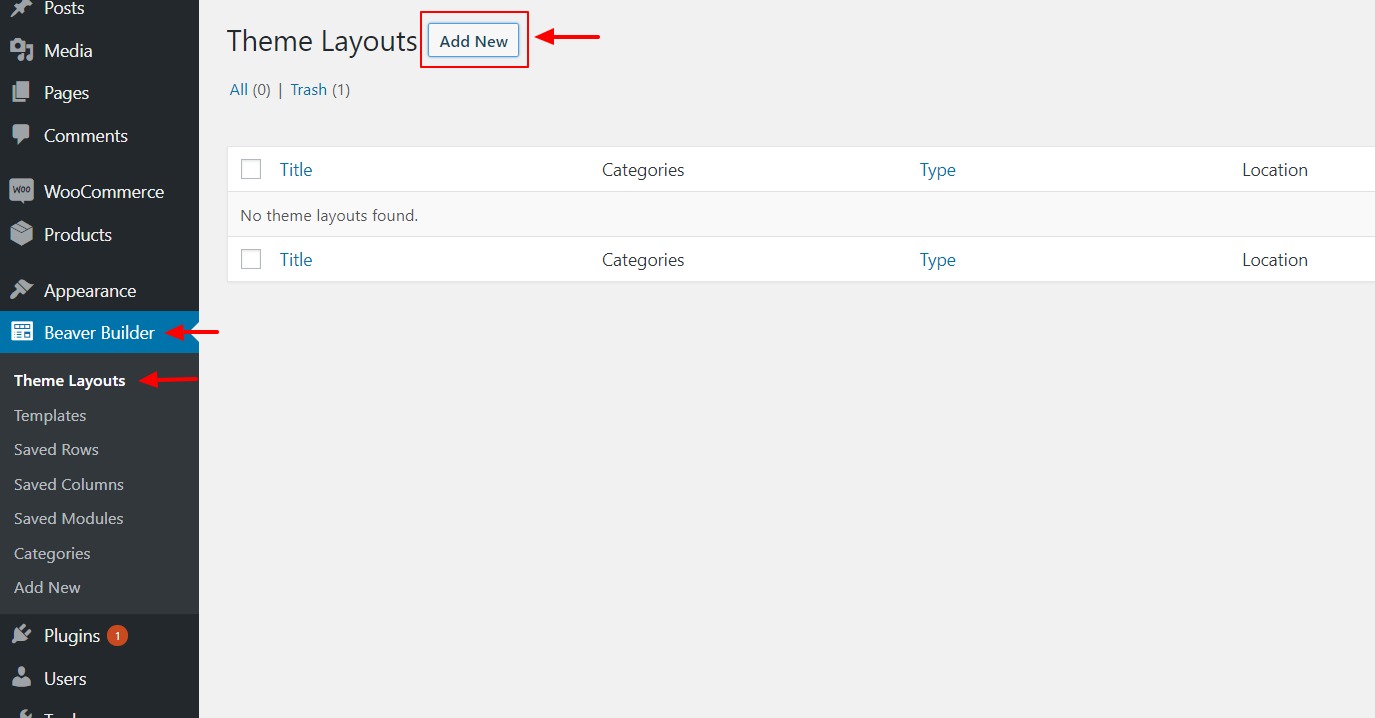
Go to WP Admin > Beaver Builder > Theme Layouts. Click on the Add New button to add a new Layout.
Step 2: Setting Page Attributes
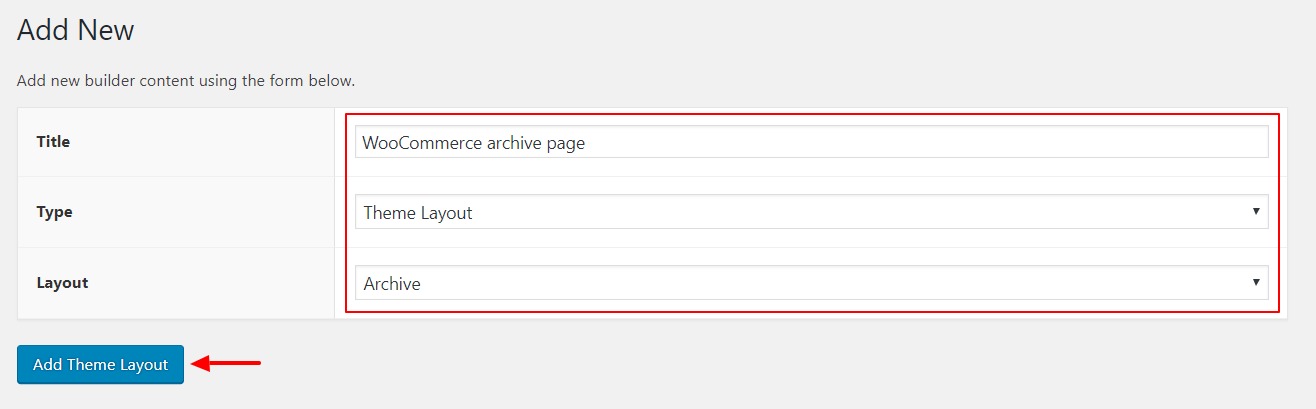
Give your Store Page a proper name, select the type as Theme Layout and select the layout as Archive. Click on the Add Theme Layout button.
Step 3: Adding Location and User rules
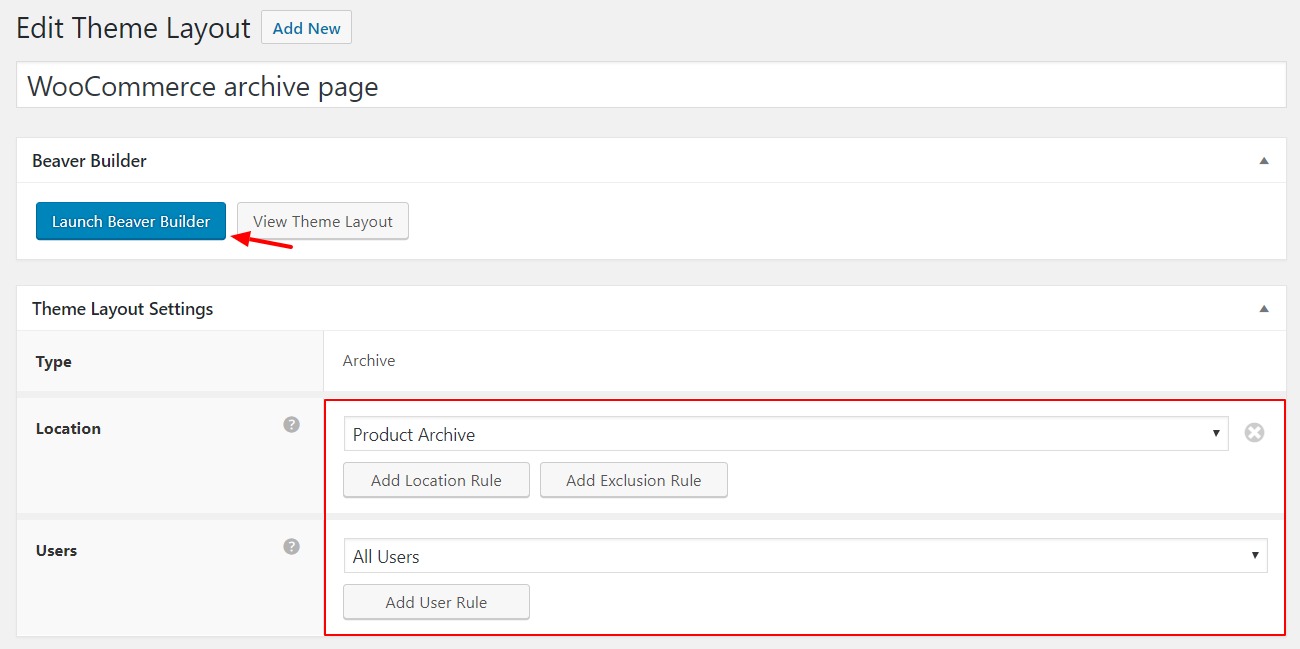
Select the Location as Product Archive and Users as All Users to make the shop page visible to all users. Once it is done, click on the Launch Page Builder button.
Step 4: Designing the Page
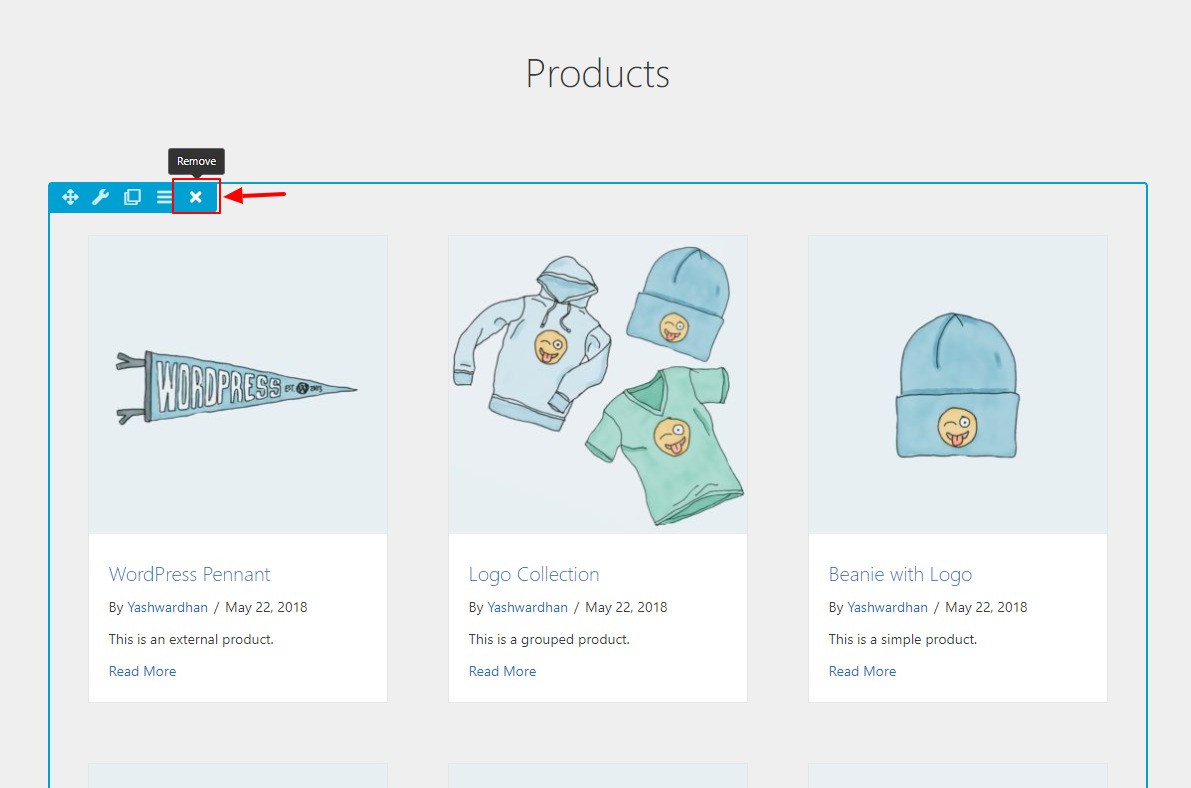
Once the page loads, you can see that the posts module is already loaded on the page. Go ahead and remove it as we won’t be needing that.
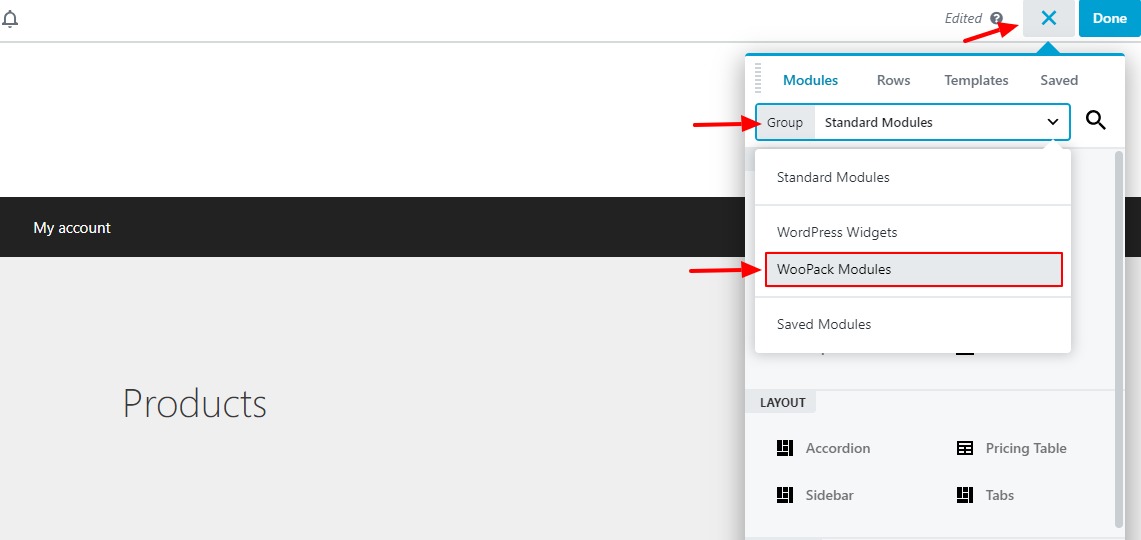
Step 5: Adding the WooPack module
Click on the “+” icon at the top right corner and select the Group as WooPack modules.
Step 6: Adding Product Grid module
Drag and drop the Product grid module on the page. Once you do that, the WooPack Product Grid settings will open up.
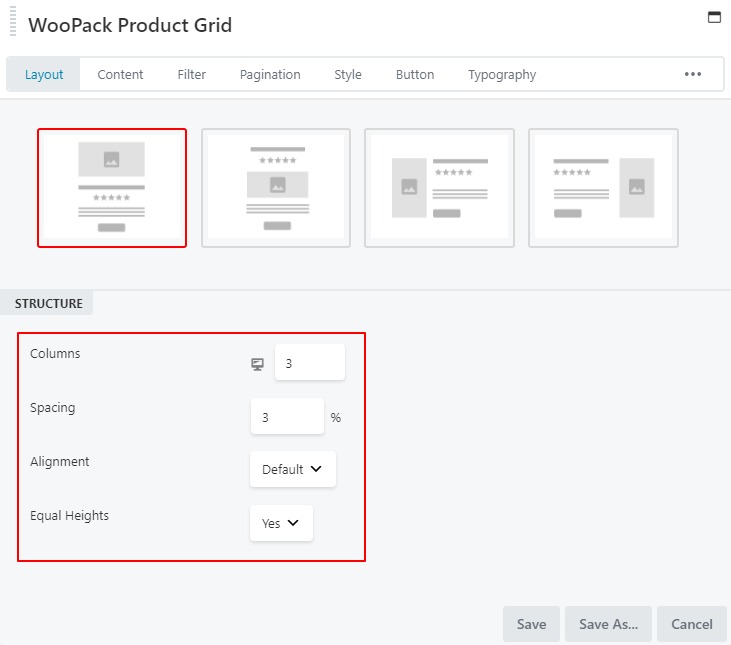
Step 7: Choosing Layout and Structure
Select the layout you want from the given options. In the structure subsection, you can change the number of posts you want to display per page, columns, spacing, etc.
Step 8: Setting Up Content Parameters
Now we need to define what all products should be displayed. Select the source as “Main Query” to begin with. You can show/hide product title, price, rating, and even short description of the product.
If you want a custom button apart from the “Add to Cart” button, you can change it here under the button tab and give the respective link. Enabling/disabling quick view, taxonomy, and image are other options which you can use here.

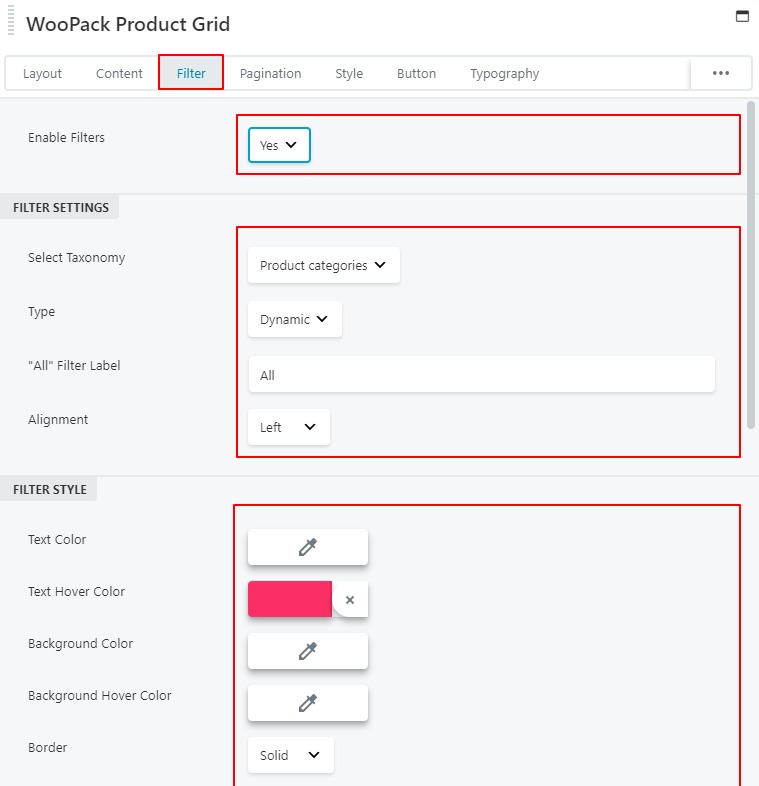
Step 9: Customizing Filter
This filter is the one that the user can use to find the desired product. To begin, first of all, enable the Filter under the Filter tab. Now you will be able to adjust all the filter settings.
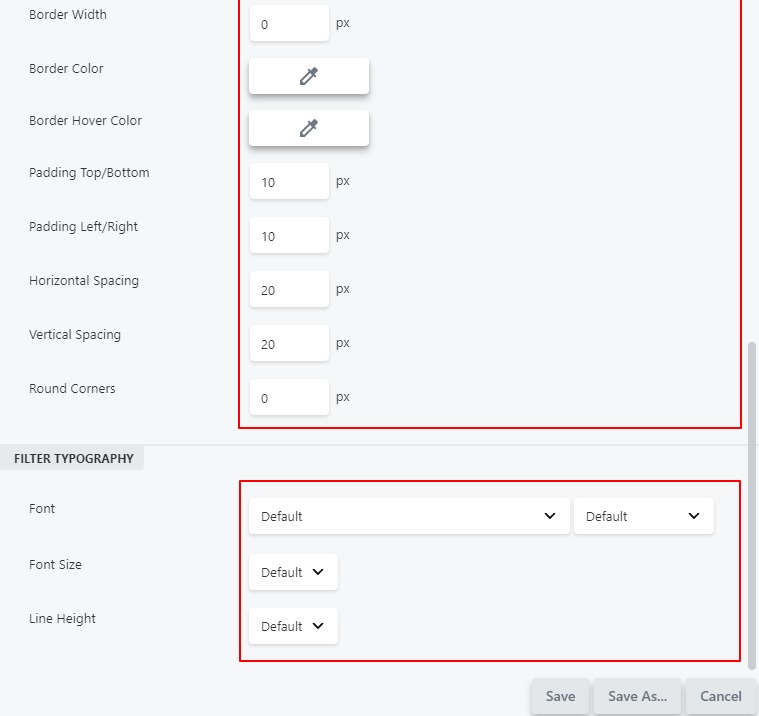
Select the taxonomy from the list to fetch the filter data. You will be able to see the changes live on the builder as well. You can change the filter style as well as the filter here. Even the styling changes such as background, border, padding, etc. can be made here only. Make the changes according to your website and the theme of your products.
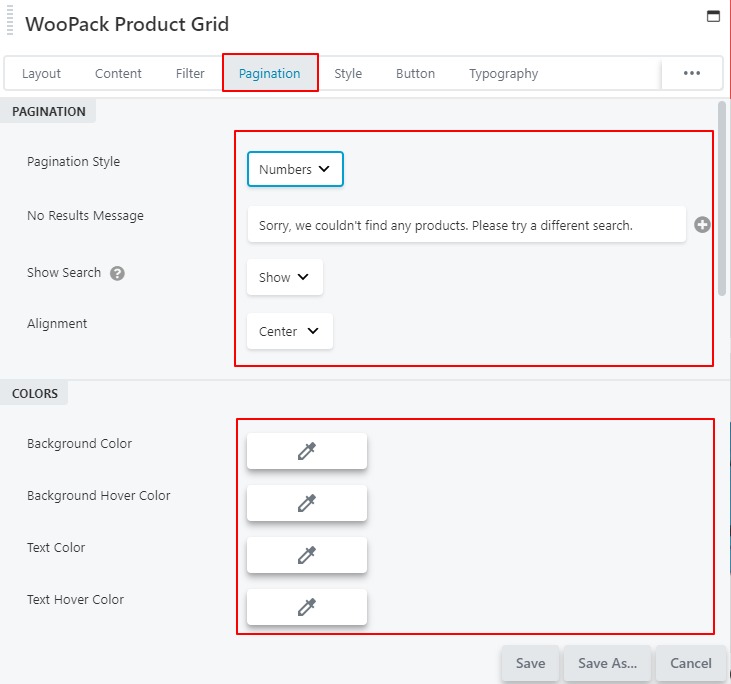
Step 10: Setting Up Pagination
Decide weather if you want numbers or scroll on your products page by a simple drop-down selection. There might be a scenario where no products match the search query. In this case, you can give out your custom message such as “No result” or “Sorry, we couldn’t find any products.”
Same as before, you can make changes to the pagination and its attributes such as margin, padding, border, other coloring styling settings, etc.
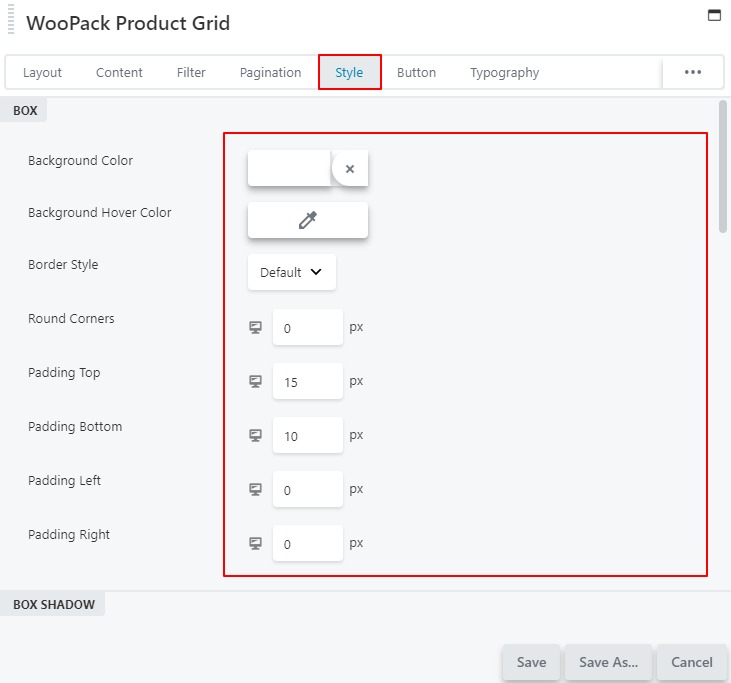
Step 11: Overall Styling the Module
Now you get to change all the attributes that you were not able to change till now. Starting with the box settings such as background color, style, padding and you can even enable/disable box shadow for the grid.
The Sale badge is easily editable via the Sale Badge sub-section with parameters such as position, color, text color, spacing, padding, border, etc. If you want to change how the rating stars look, you can improve their appearance such as color, background, padding here.
Similarly, if you have the quick view enabled, you can make the same changes to it as well.
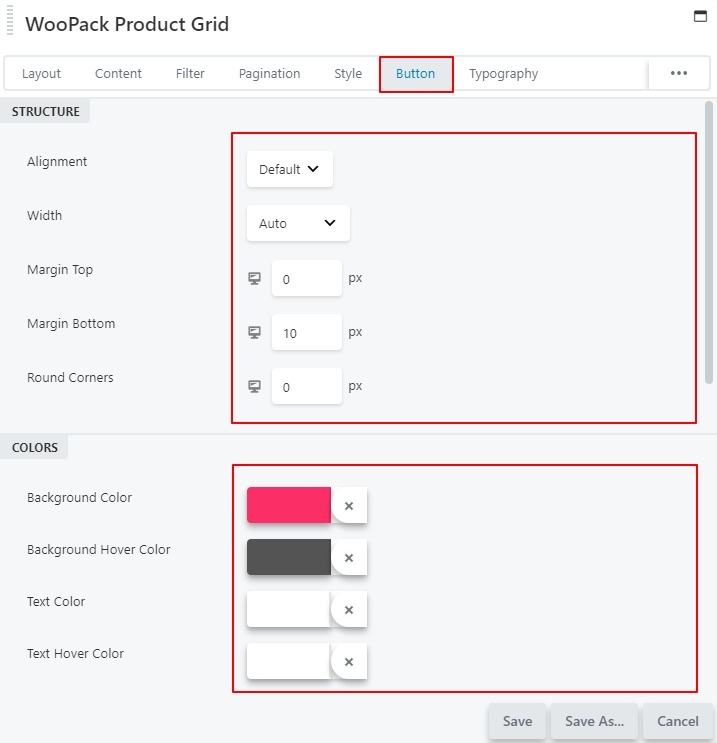
Step 12: Customizing Button
Button plays a vital role as it acts as the CTA of the product. It is very crucial that the button looks more appealing yet straightforward. All this can be done via the Button tab. Change the way button looks such as its alignment, width, margins, etc. You can also change the typography, padding, border of the button using this tab. Go ahead and make the changes as per your needs.
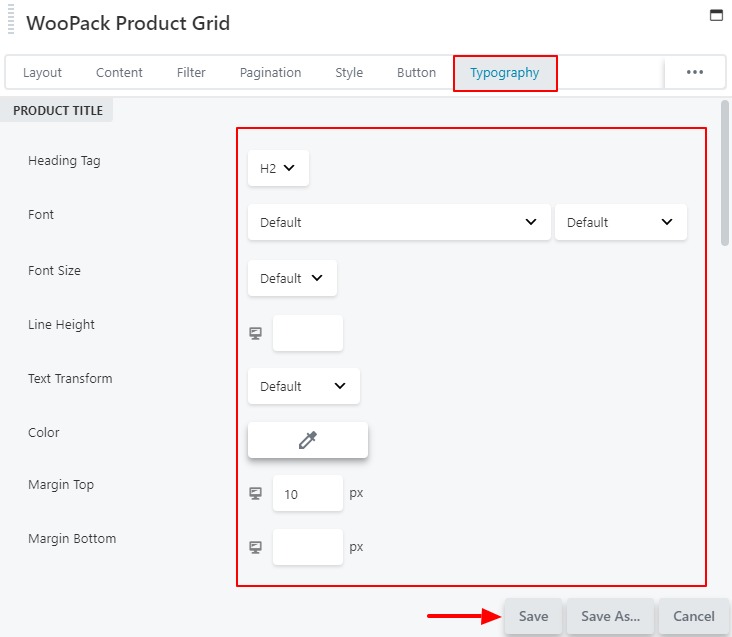
Step 13: Altering Typography
We do have made typography changes to some of the grid elements, but the ones left can be altered in the typography tab. You can change the font, heading tag, size, line height or the margin. You can alter the text of Product title, Price, Sale Price, Sale badge, Taxonomy, and Quick View.
Give the settings another look and see if everything is the way you want or not. You can also press the P button to preview your creation and re-edit accordingly. Once you have made all the changes, click on the Save button.
Step 14: (Optional) Adding Other Elements
Now, the product grid is not the only thing that you want to display on your website’s products page. You might as well want to throw in other modules such as a title which says, “Our Products” or a CTA banner at the bottom which makes the page more engaging. Once you have done all that, click on the Done > Publish button at the top right corner of the builder.
Note: Since we have made this Layout as Product Archive, we do not need to change the Products page link in WooCommerce settings.
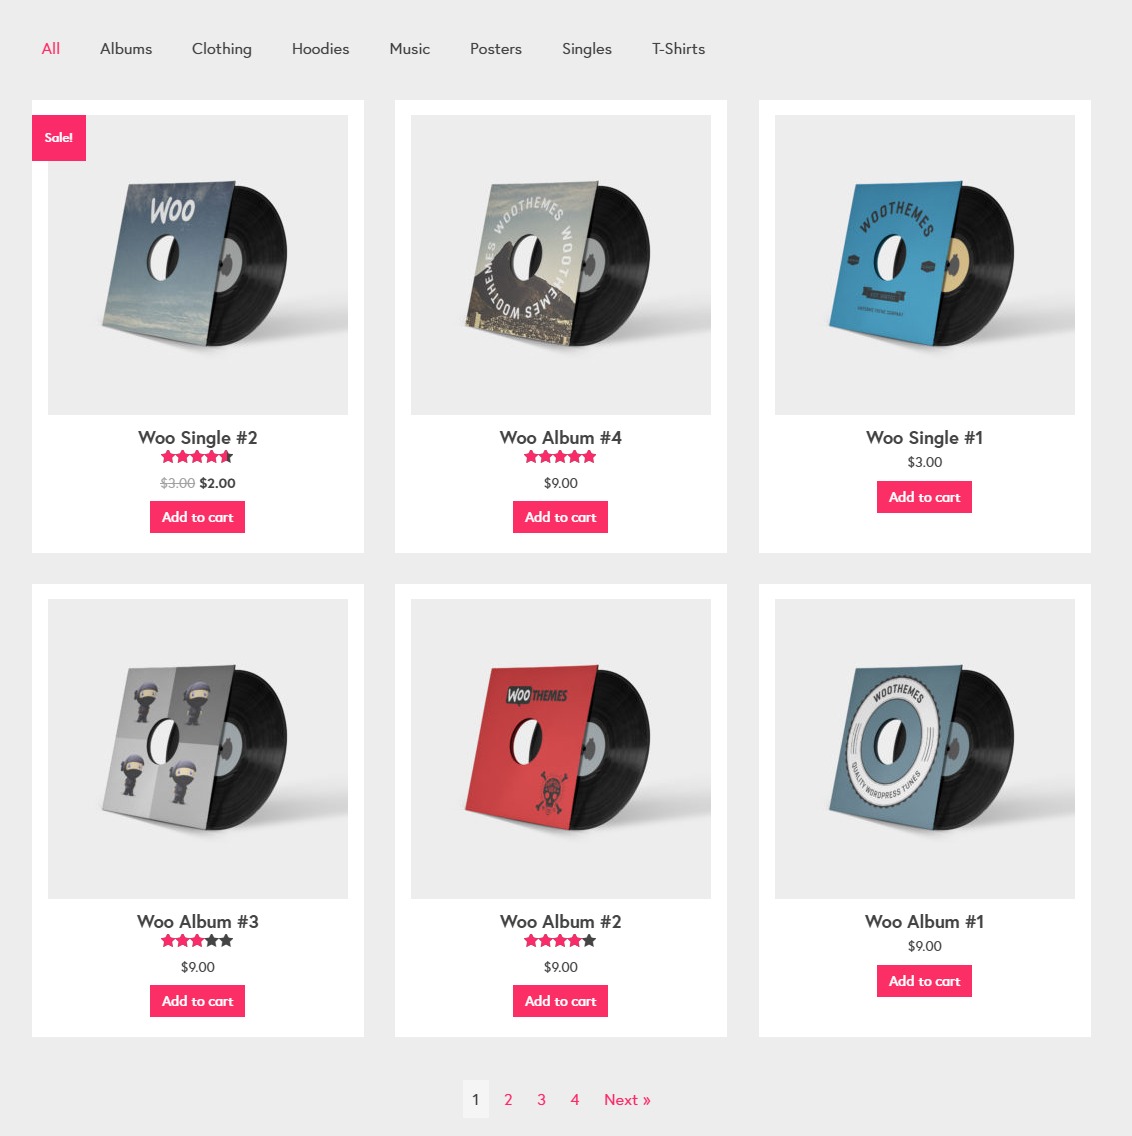
This is the final result:
Summing Up!
Congratulations! You have fully customized your Products page without touching a single line of code! Shop Page is just the tip of the iceberg; you can customize your single Product pages, Checkout page, Cart page, and even the Add to Cart button!
Get WooPack for Beaver Builder
WooPack is a set of WooCommerce Modules for Beaver Builder. It will help you build beautiful WooCommerce websites while using Beaver Builder 🙂
Click here to check the WooPack page for more details.
A few more interesting posts →

PowerPack Beaver Addons
Start creating beautiful websites with 65+ modules and 350+ templates for Beaver Builder.