How to add Particle Effect Background to your Beaver Builder website
Last updated October 8, 2019 · Priyanka
Do you ever get mesmerized by the beautiful, moving particle effects background on a website? What if you wanted to create the same for your Beaver Builder websites?
Taking the web by storm, the particle effects background style not only highlights your websites’ appearance but also makes a great impression on your visitors.
With the Background Effects feature of PowerPack, you can add excellent animated backgrounds on the website. These animations consist of an extensive list of styling options which give you complete flexibility to customize the color, size & quantity of the moving particles.
Particle Background Effects in PowerPack is based on the popular Particle.JS library. It’s a light-weight JavaScript-powered animation library for creating elegant particle effects on any website.
What is a Particle Effects Background?
The Particle background effects consist of moving elements. These elements can be configured as per different parameters like shape, size, radius, color, etc. The Particle.JS animation library allows us to customize the particle behavior as well.
The Particle background effect can be used creatively for creating various kinds of styles like snowfall, galaxy, stars, polygons, etc. You can also disable the animation or moving effect and create a static particle effect.
Where can we use these amazing background effects?
Particle background effects can be added to various sections to create stunning visual effects on the website. You can use particle effects for special festive offers or just for fun! How about adding a snow effect during the winters on your website? Or you can add some stars for Christmas?
Other than the fun part, the particle effects background can be used for contextual design experience as well. E.g., you can add polygon or circular background effects for a music website. You can add a connected dots background for a technology or research website.
Also Read: 10+ Background effects for Beaver Builder
For a photography website, you might like to add some subtle animation with small dots. Here’s an example of a Christmas offer with snowfall particle effect.
Christmas offer!!!
buy one get one free
How to add Particle Effect Backgrounds with Beaver Builder?
Before we begin, make sure you have installed and activated both Beaver Builder and PowerPack Beaver Builder addon on your WordPress website.
Step 1: Set the Animated Particle Background Effect for a Row
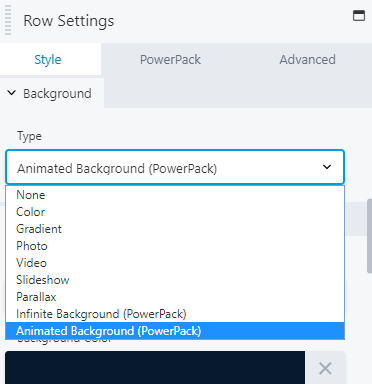
Go to the page where you want to add the particle background effect. Open it with Beaver Builder editor. Once you are in the editor, click on the section you wish to edit.
From the Style tab, select Animated Background (PowerPack) option.
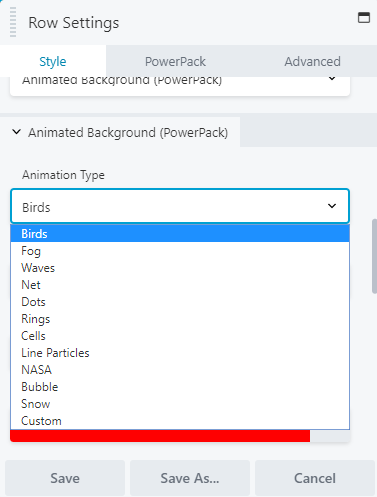
Step 3: Choose from the Inbuilt Animation Types
Particle Background Effects feature of PowerPack includes NASA, Bubble & Snow animations. You can choose any of these prebuild effects & add it to your website to enhance its appearance & looks.
With NASA animation, you can create a beautiful twinkling star effect on your website.
Bubble animation allows you to create cute bubble animation which helps you to add a magical effect on your website.
Create a magnificent snowfall effect on your website using Snow animation.
Step 4: Particle Layout, Design & Customization:
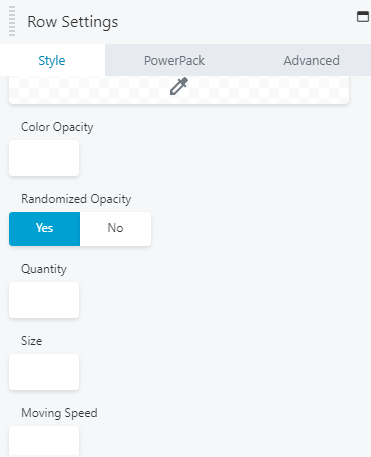
With Particle background feature of PowerPack, you can customize the background effect as per your preference. It gives you complete flexibility to design every aspect of the particle.
Some available customizations option are:
- Size
- Color
- Opacity
- Quantity
- Hover Effect
- Moving Speed & Direction
- Enable or Disable Background Image
By playing with these customization options, you can create creative Particle Background effects for your website.
Here is an example of a beautiful Bubble Background Effect created with a Particle Background Feature of PowerPack:
How to Customize Particle Backgrounds Effect?
Although in this feature, we have integrated stunning & alluring background effects, however, if you want to create your custom background effect, you can easily do it by customizing background style with JSON code.
Let’s see how you can easily add a custom moving particle background effect.
Step 1: Generate Custom Particle Backgrounds Effect
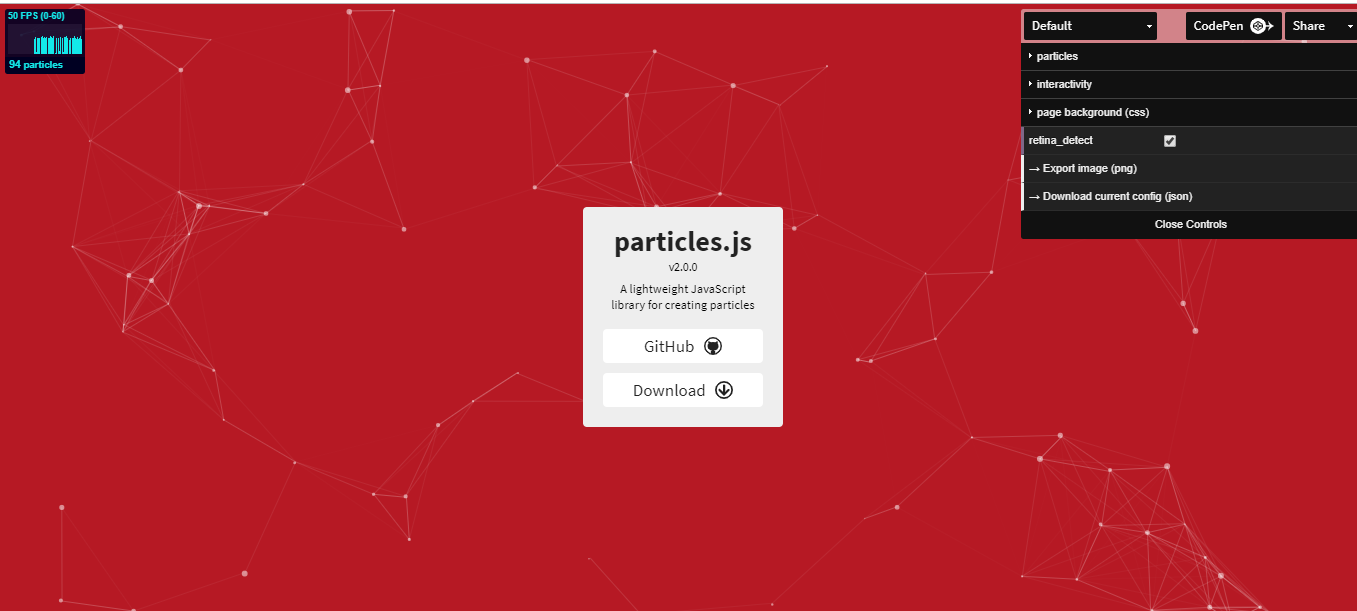
- For designing custom particle background style, visit the Link Here.
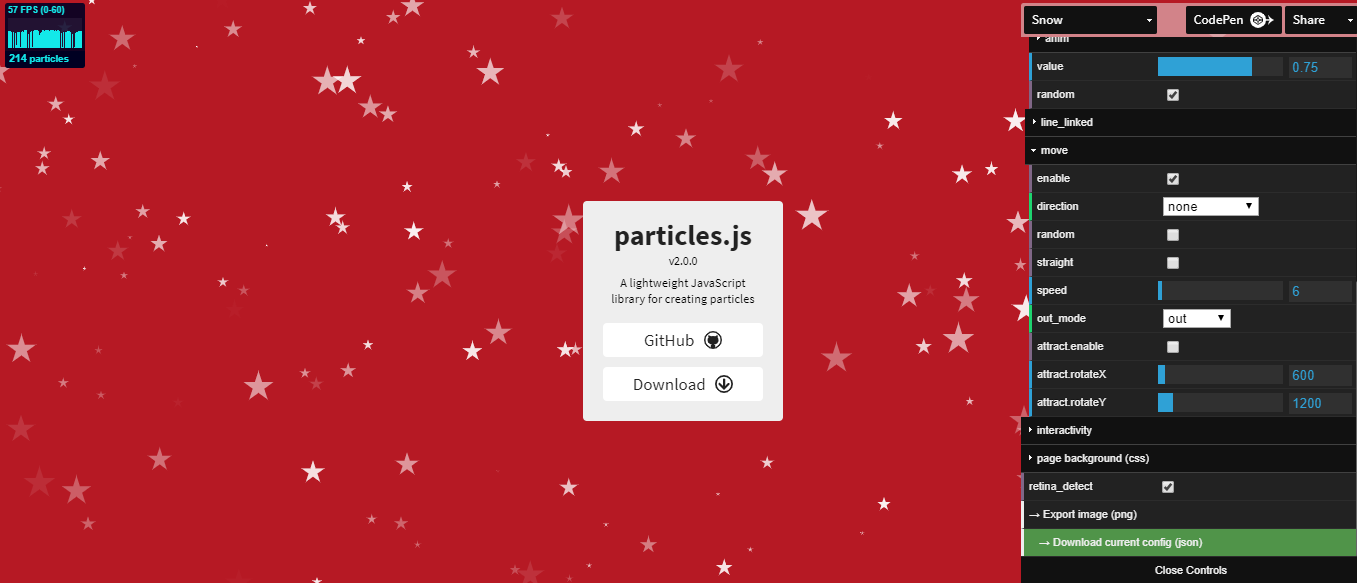
- Choose from the multiple options & generate effects as per your requirement. All the options are self-explanatory; all you have to show your creativity & generate code.
- There are different types of configurations you can play with. You can select Particle Size, Number, Color, etc.
Step 2: Choose Particle Color, Shape, Number, Density, Moving Characteristics
- Go on to Particle option, select Number of moving particles & their Density value area.
- From the Color option, choose the best-suited color for the particles.
- Next is a Shape option. From here, you can choose the type of Particle Shape you want for your website.
- Define Size, Opacity & Moving Characteristics of the particles.
Step 3: Download JSON file
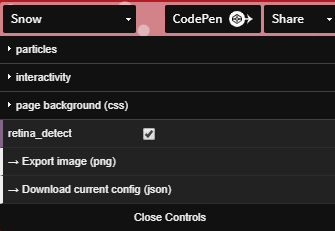
Once you are done with custom styling, click on the Download current config (JSON). This will generate the required JSON code for custom styling.
Step 4: Add custom JSON code to your Beaver Builder
- Open the downloaded file and COPY the entire code
- Go to your Beaver Builder page, where you wish to add this custom style background effect.
- Open the style tab for Row & from the Animation Type, choose Custom as a style option.
- Paste the entire copied code in Add custom JSON Particle window.
Final Output:
After adding Custom Particle Backgrounds Effect, this is how the effects look on your website rows & column.
Winding Up!
Now you can easily create a stunning Particle Backgrounds Effect for your Beaver Builder website. You can either choose from the pre-build styles of PowerPack or can customize it by using the JSON code.
Please create your Particle Backgrounds Effect, and share it in the comments below.
We’d love to see what you come up with! 🙂
