Getting Started with Beaver Builder
Last updated July 15, 2019 · Yashwardhan Rana

Are you one of those bright brains who had a great idea to start your website but got stuck because you don’t know how to code Well, you don’t have to worry now! There is a very concrete and powerful solution to that.
Introducing the Beaver Builder

Beaver Builder is a front end drag and drop page builder plugin that helps you build your website without writing code. You can create your site by just selecting and dragging the element or the content and just placing it wherever you need, and that is it! Beaver Builder will handle the code part itself!
Beaver Builder comes with various modules and more than 30 pre-built templates just for landing pages. Other than that you will also get 25 content pages to choose from!
Editing and customizing these templates is easy. You can do that by adding or removing the modules you want to see there, and you can do all this in real time!
So let’s jump to it and see how can you install this awesome plugin onto your website.
Step-by-step Beaver Builder Installation Guide
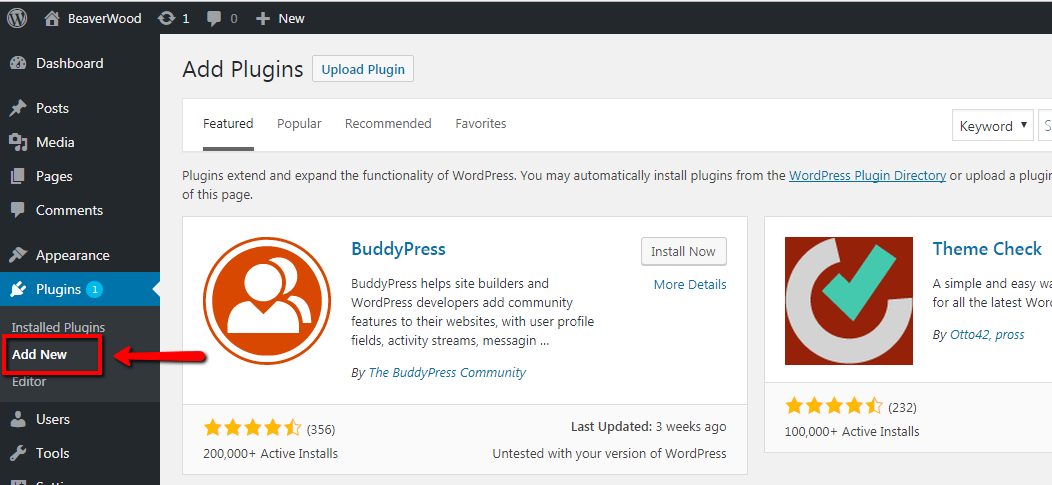
Step 1: First thing you need to do is to open your WordPress Admin area. Now select the “Plugins” options and then click on the “Add New” button.
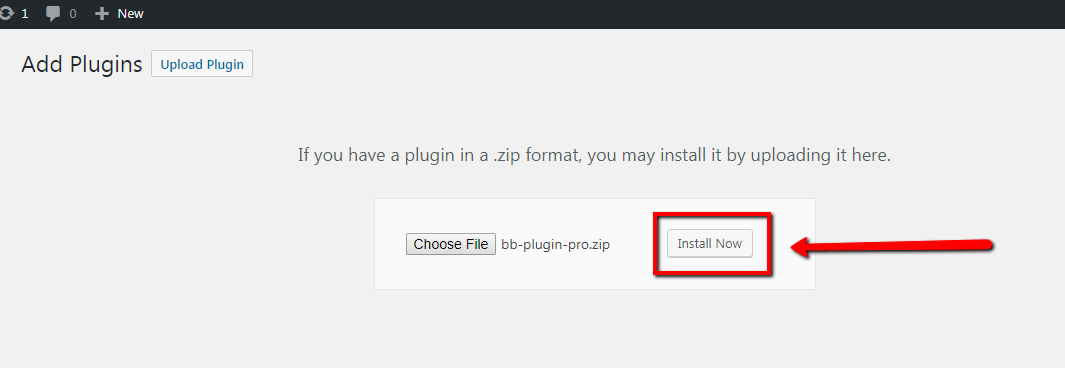
Step 2: Click on the “Upload” button at the top of the page.

Step 3: Upload the Beaver Builder plugin and then click on the “Install Now” button.
Step 4: Click on “Activate” button to enable the plugin.
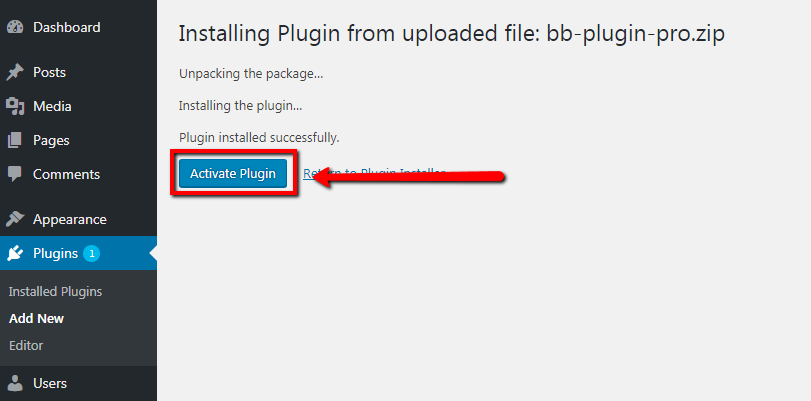
Congratulations! You have successfully installed the Plugin on your Website!
Now since we are done with the installation, we can begin to learn how to make a full page using the Beaver Builder, but before proceeding, I think we should clarify some basics first.
Global Settings
Global Settings are the options for your whole website. When you make changes in the Global Settings, It reflects on the all the pages rather than just a single page.
Accessing the global settings is very easy. Here are the steps:-
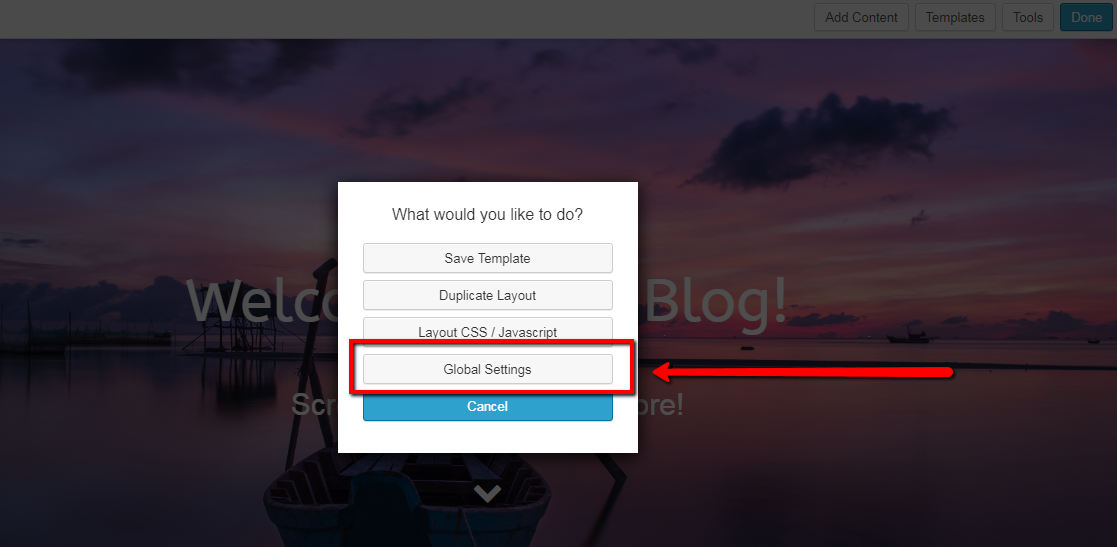
Step 1: While in the page editor, click on the Tools button in the top right corner of the window.
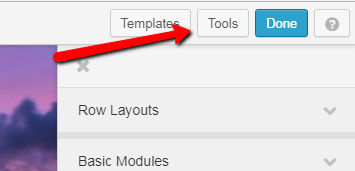
Step 2: Then select “Global settings” which is just above the cancel button, and you are in the Global Settings section!
Here is an image showing how global settings look.
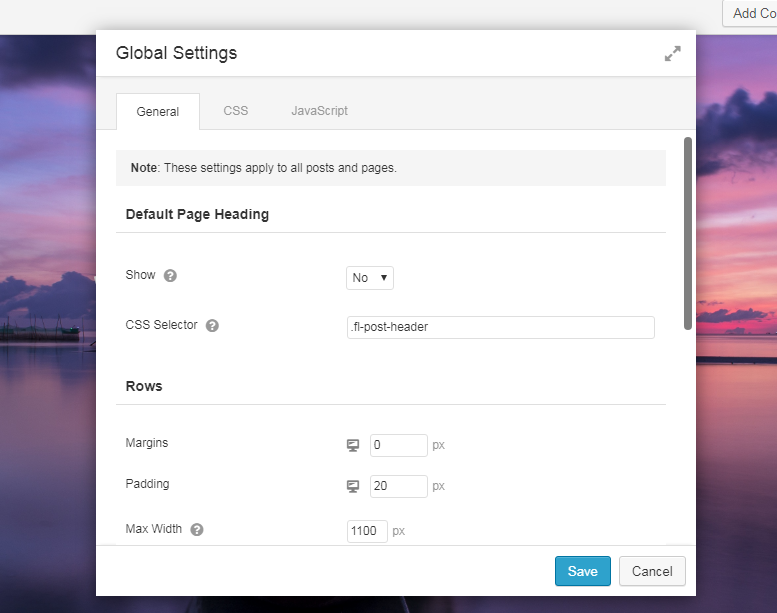
There are many options in the Global Settings Panel like responsiveness, margin, padding, the maximum width of the web page, etc. and you can also add custom CSS and JavaScript if you want to.
Beaver Builder Theme
The Beaver Builder(plugin) is the base product, and it gives you the access to edit and make changes in your content area. On the other hand, the Beaver Builder Theme assists in altering everything except the Content area which includes sections like header, footer, sidebars, etc.
The Beaver Builder Theme comes with the Pro Pack of Beaver Builder which includes the Beaver Builder plugin as well. The Beaver Builder Theme is a must buy if you want to gain full control of the page. Having the freedom to edit everything including the header and footer will give you the immense liberty to edit the website. The website will become your sandbox, and you can create whatever you like!
In this tutorial also, we will be using the Beaver Builder Theme as well to make the necessary changes. Having the theme will make the job of making a custom landing page barely a job of minutes!
Row Layouts
Have you ever made a sketch of anything before drawing anything? You remember that stencil of blocks that you make to ensure which design goes where? Layouts are exactly the same.
When you insert 4 column layout, you get four different blocks(columns) to add your four different modules. With multiple column layouts, you get the freedom to insert multiple elements which mean you do not have to insert a single module in a row necessarily.
For example, if you want to make a custom offers page with a countdown timer. You can choose a 2 Column Row Layout. Insert the countdown timer in the first column and the other column, give the description and the redirect link.
Don’t worry if you are getting all confused. It will all be explained in detail later on.
Beaver Builder has nine different types of Row Layouts. 1 Column, 2 Columns, 3 Columns, 4 Columns, 5 Columns, 6 Columns, Left Sidebar, Right Sidebar, Left and Right Sidebar. All of them have different layout style and different column structures as well.
How can you insert a Row Layout in your Page using the Beaver Builder?
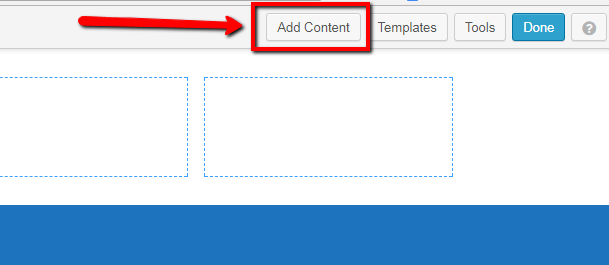
Step 1: Open the Page builder of the page that you want to be edited and click on the Add Content button.
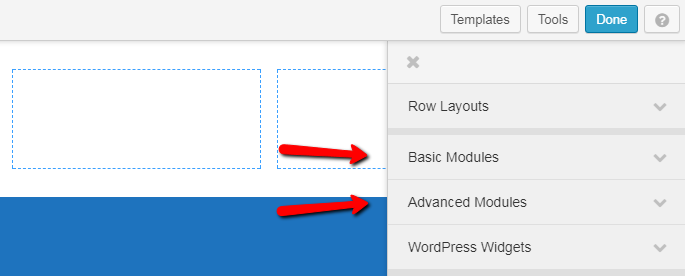
Step 2: Expand the Row Layout tab by clicking on it once.
Step 3: Simply choose the desired layout and drag and drop it wherever you want to on the web page.
The Builder will automatically adjust the other elements to make room for your custom row.
Modules
Think of modules as building blocks of your website. A web page needs a combination of modules that work together to give the most amazing experience to the user and the freedom to interact with the site. Let’s say if you have a contact us page on your website then the Email ID field, the text message on confirming the subscription, etc. becomes your elements.
Numerous elements come with the Beaver Builder, and every one of them has a unique job and believe me Beaver Builder has left no zones untouched. The package comes with every module that you can ever think of ranging from just a Button to a Count down timer. Now since we are on it, Let’s learn…
How to add a module to your webpage via Beaver Builder?
Step 1: Go to your desired page and open the Beaver Builder editor and click on the “Add Content” button at the top right corner of the page.
Step 2: Now, there are two different tabs, first is “Basic Modules” and the second one is “Advanced Modules”. Select the one you want.
Step 3: Find the desired module and then just simply drag it and drop wherever you want to see it on the page and voila! It’s done.
There are many other changes that you can make to your widgets. We will see each of them individually later.
Since now we are all set to create our first landing page, Let’s jump to it!
How To Build a Landing page for your website using the Beaver Builder?
Creating a whole landing page surely does sounds scary, but actually, it’s unbelievably comfortable. Believe me or not you can build your entire landing page within 5 minutes! Having a hard time believing me? Check it yourself!
Now since Beaver Builder comes with almost 30 pre-made landing page templates, I will go with a Pre-designed template. Beaver Builder has spared no design. Every impressive design you can think of, it is already in the Beaver Builder landing page templates library. So, in this example, we will make a landing page using one of the templates.
Here is a step by step guide on “How to make a Landing page using the Beaver Builder”
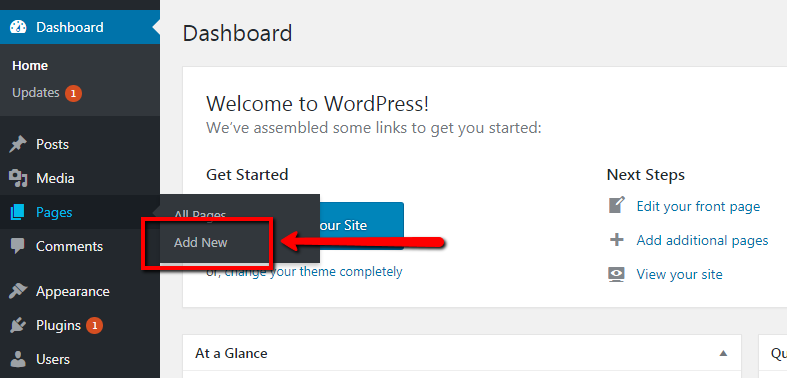
Step 1: First of all you have to add a new page to your website. For this, go to your admin area and click on pages and click on add new page.
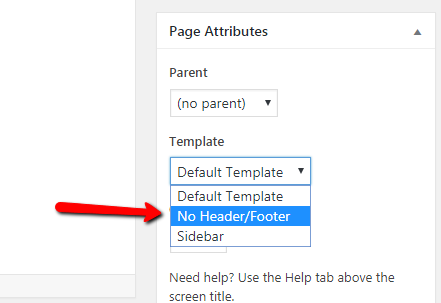
Step 2: Now in the WordPress new page screen, look at the right side of the screen. You will find Page Attributes panel. Select the option “No header/Footer” for the Template option.
This will remove the header and the footer from the page.
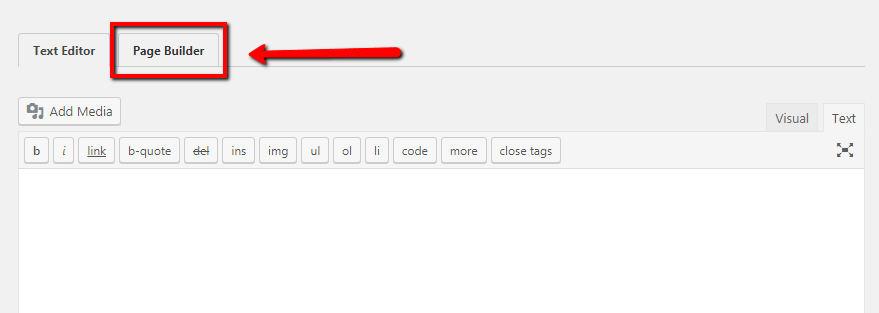
Step 3: Now under the Title bar look for the “Page builder tab.” Click it, and this will launch the Beaver Page Builder.
If you are starting the Beaver Builder for the first time, a tutorial will pop up. You can skip that as we have explained everything here 🙂
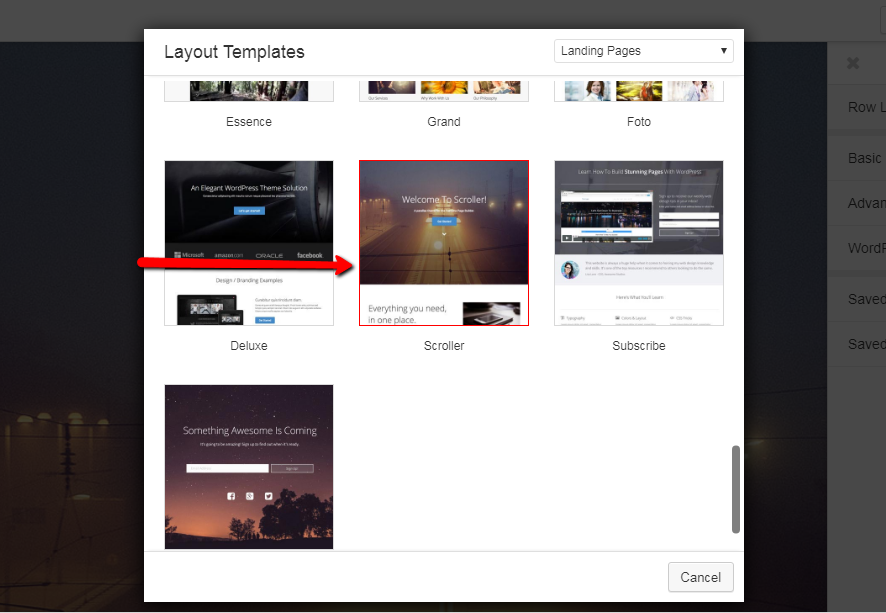
Step 4: As the editor will open, a window for templates will open up. Select any of the templates that you like. You can change the template later as well.
Here, I am choosing the Scroller Template.
Step 5: Upon selecting, you can see the web page is automatically loaded.
Step 6: Now we only need to edit this page to make it the way we want. Let’s start with the Welcome heading. Click on the “Welcome to Scroller!” title. This will open the editing options for the title.
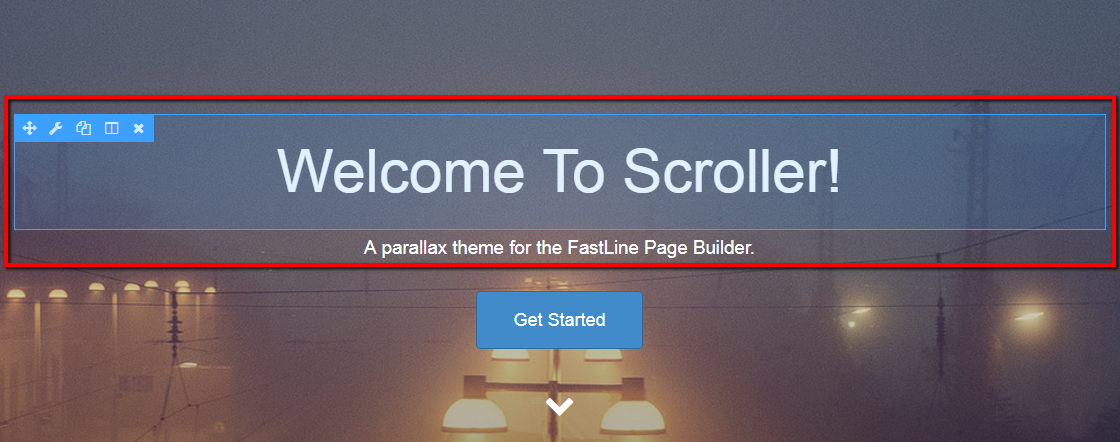
Step 7: Under the General Tab, change the heading from “Welcome to Scroller!” to “Welcome to my Blog!”

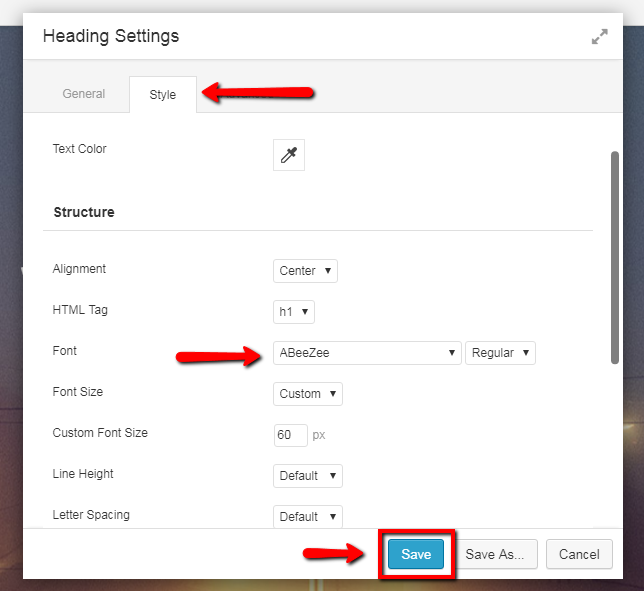
Step 8: Now let’s go a step further and modify the font to something else. To do this, you have to go to the style tab, and under the structure panel, you will find Font option. Select any other font that you like. I am going with “ABeeZee” font. Click on the Save Button.
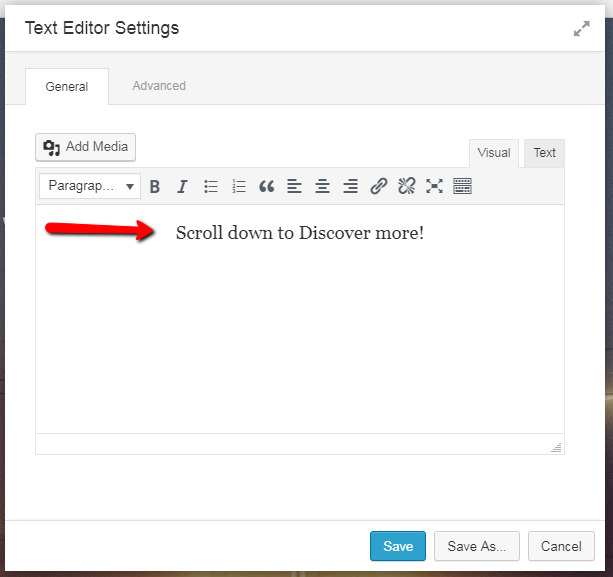
Step 9: Under the Heading, there is a sub heading. Change this also with whatever text you like. I am going with “Scroll down to discover more!”. Just Click on the text and when the editor opens up, Replace the text and click on save button.
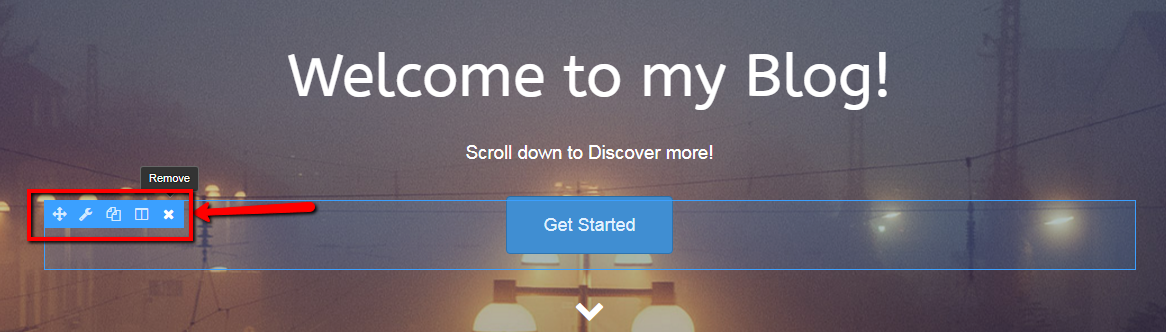
Step 10: As I don’t want the Button here, so I will just remove the button by clicking on the “x” button on the top left corner of the button.
When the delete confirmation message shows up, click yes to remove.
Step 11: Scroll down and make the changes as you desire by just clicking on the modules and editing the options as per your choice. I have also changed the Title Text and the text paragraph by following the same steps mentioned above. Here are the changes that I made.

Step 12: The images also can be easily changed.
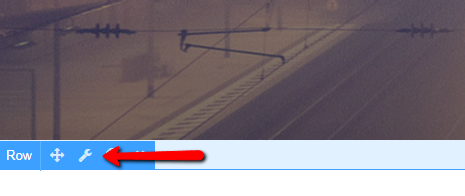
Step 12(A): Click on the image or click on the little wrench icon at the corner of the picture. The photo settings window will open up.
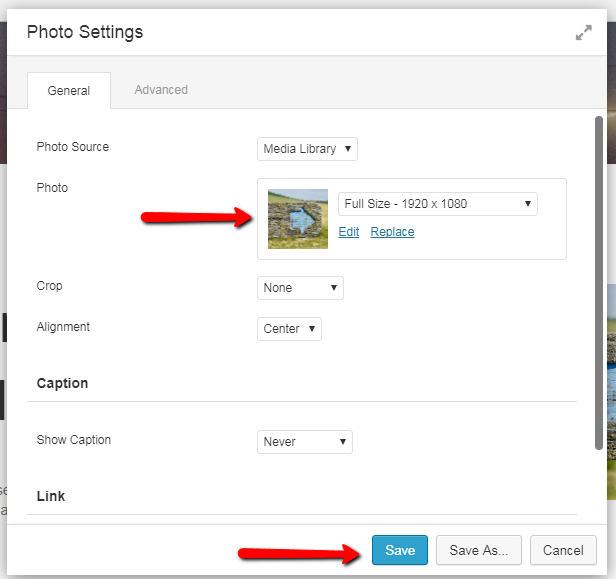
Step 12(B): Click on the “Select Photo” link under the general tab and select the desired image. This will fetch the picture and just click on the save button, and the changes will be made.
Repeat this step for all the images that you want to change. If you want to change the image on the background, click on the wrench icon and look for the Background parallax under the General tab and change the picture and click save.
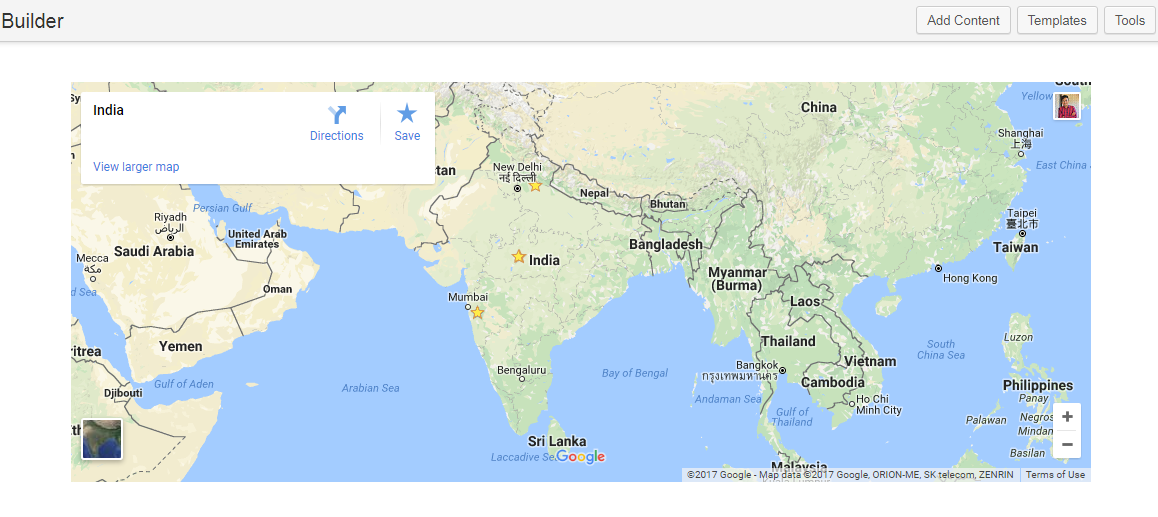
Now, on the third section of the page, there is an empty container in front of the parallax scroll, This does not look good, right? Let’s add something there. Just follow the steps we discussed earlier adding a module to the page and add a map there.
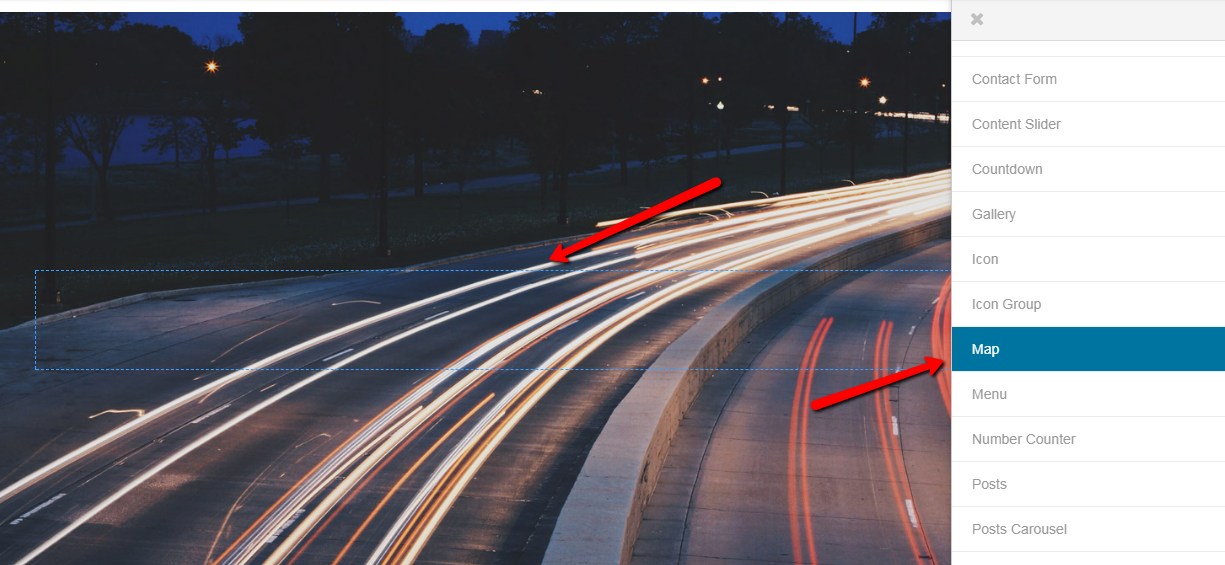
After dragging and dropping the Map module, entered the location address. Here, I am setting Goa, India as my location on the map. Set the location and click save.
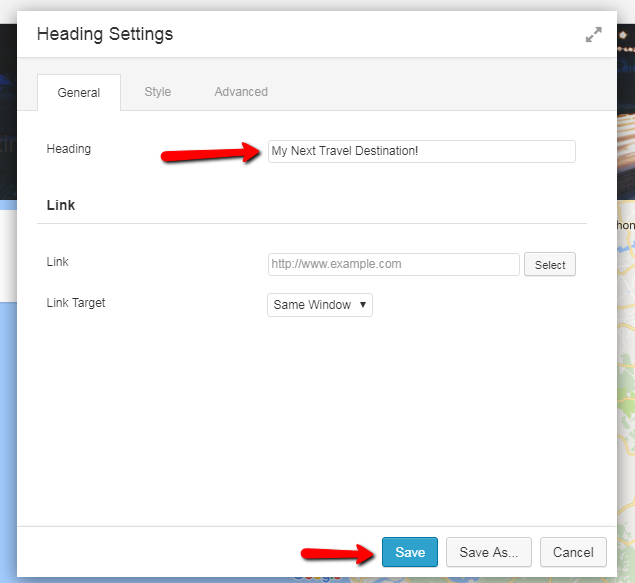
I thought a little explanation would make more sense, so I added another Heading Module above the Map. This is how I did it.
Step 1: I added a simple heading above the map by simple drag and drop operation.
Step 2: I added the Text as “My next Travel Destination” on the heading.
Step 3: I customized the attributes a little bit, and these are the changes I made.
- Alignment – Center
- HTML tag – H3
- Font – Istok Web
- Font Size – Custom(48)
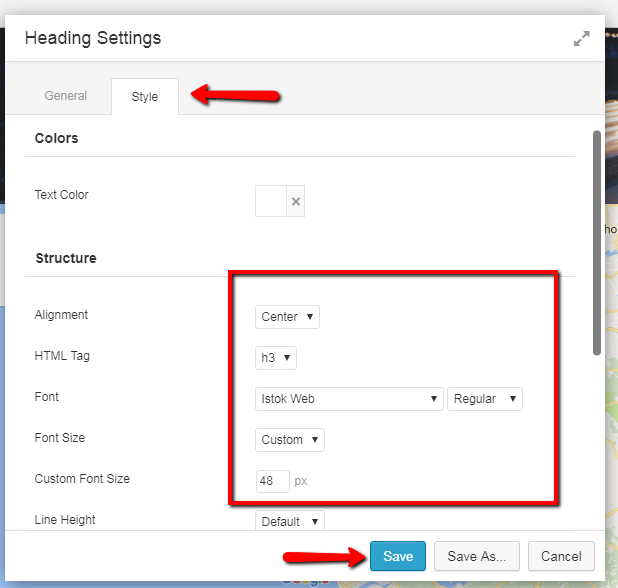
Step 4: Click save.
Now, I did not need the next two rows and parallax. So I decided to remove them by simply hovering over them and clicking on the “X” button at the corner.
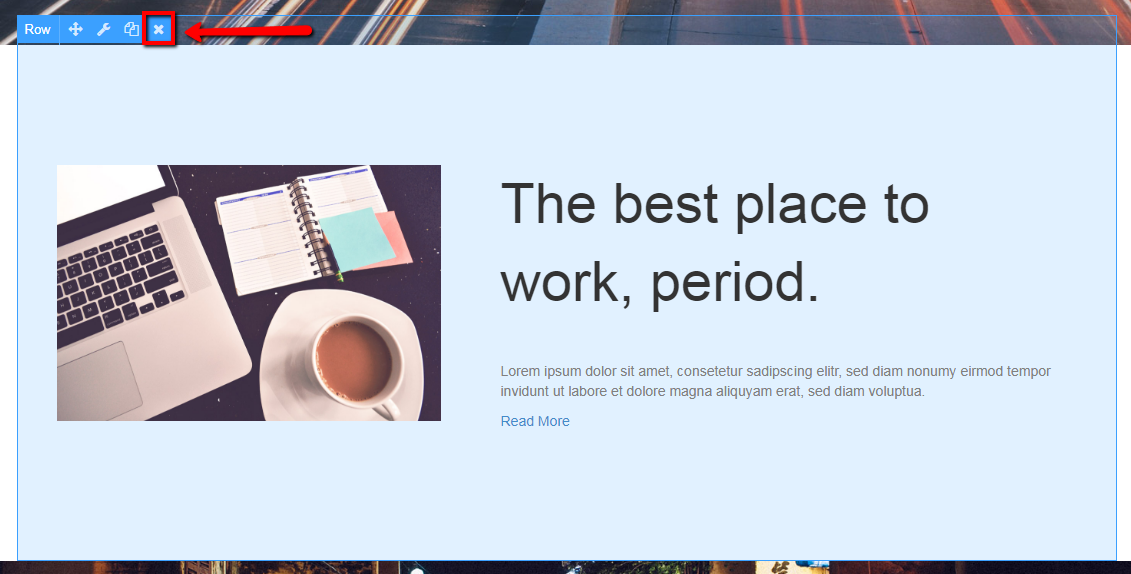
You do not have to worry about the rows below the ones you deleted. Beaver Builder automatically moved up the ones that are under the one you removes.
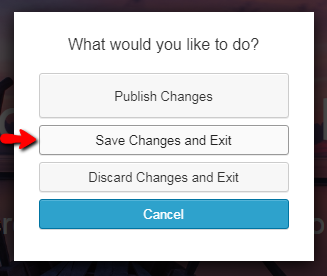
When you are finished, click on the “Done” button and then click on the “Save Changes and Exit” button.
Congratulations! You have a Perfect Landing page for your Website!
But wait! Something is missing. This is just a page on the website. We need to make this as the landing page. To do that follow the steps.
How to make your custom page as your website’s Landing page?
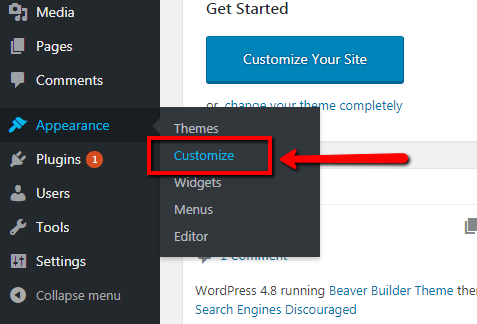
Step 1: Go to your WordPress Admin area and click on the Customize option under the Appearance tab. The site editor will open up.
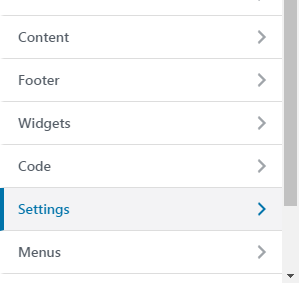
Step 2: Look in the left sidebar for Settings option and select it.
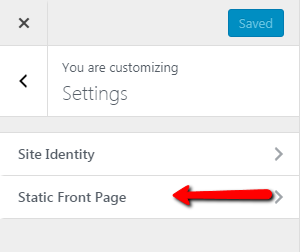
Step 3: Click on static front page option and select “Static Front Page” radio button.
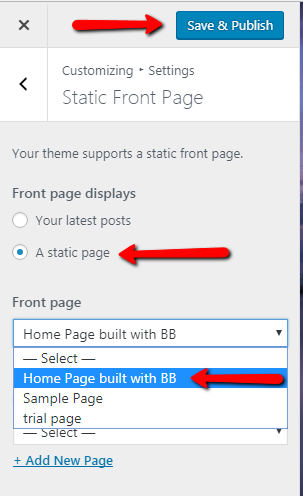
Step 4: Select the post from the drop-down list and then click on the save and publish button at the top of the sidebar.
Congratulations! You have finally made your page as your landing page!
That wasn’t that much difficult, right? Well, of course, it was a million times easier than coding it all the way. This was just the landing page. You can make as many pages and whatever page you like using Beaver Builder. This was just a single bit of awesomeness that the Beaver Builder carries
Want to unleash the real power of the Beaver Builder?

If you want to unleash the full epicness of the Beaver Builder, I would strongly recommend you to go for PowerPack Beaver Addons. This bad boy is loaded with impressive features like more than 50 Modules, 250+ templates and all that just for a value of $69 for the whole year!
This impeccable add-on is made with performance in mind, so every module and templates load seamlessly fast. If I were you, I would definitely jump the ship and get my hands on the PowerPack Baver Addons!
If you liked what you just read, do share the love by sharing this article across social media platforms. In case, if you have any doubts, do let me know by commenting down below I will be happy to help you out 🙂
A few more interesting posts →
3 Comments
Leave a Comment

PowerPack Beaver Addons
Start creating beautiful websites with 65+ modules and 350+ templates for Beaver Builder.
Great read! I ove how informative this article
This was really a great post to remember. love the topic
This was a great post! You really gave me some helpful information. Thanks so much!