Create a Food & Drinks Menu with Beaver Builder
Last updated March 28, 2018 · Yashwardhan Rana

Do you build or manage websites for Restaurants & Cafes? Or do you run a Restaurant/Cafe website yourself? You must have felt the need of listing your Food & Drinks Menu on your website. Not to mention, it also requires frequent updates for some special offers or new additions.
Having a simple page which will list all your Menu items is not what an ideal menu page should look like. You need to make it engaging.
Bifurcating your menu items according to categories and displaying them individually is a much better way of presenting the menu online. If you use Beaver Builder then you can create a nice Menu for your site which is easy to set up and manage.
Here we will learn about how you can create an impressive menu with Tabs. For this, we require these two modules:
Since we are now clear about what we are going to do, let’s see how we can do it.
Creating a Restaurant Menu with PowerPack
Before we go any further, first make sure you have these tools ready to go –
To create the tabs restaurant menu, we will first create individual sub-menus using the Restaurant Menu, and then we will proceed to add those menus to the Advanced Tab module.
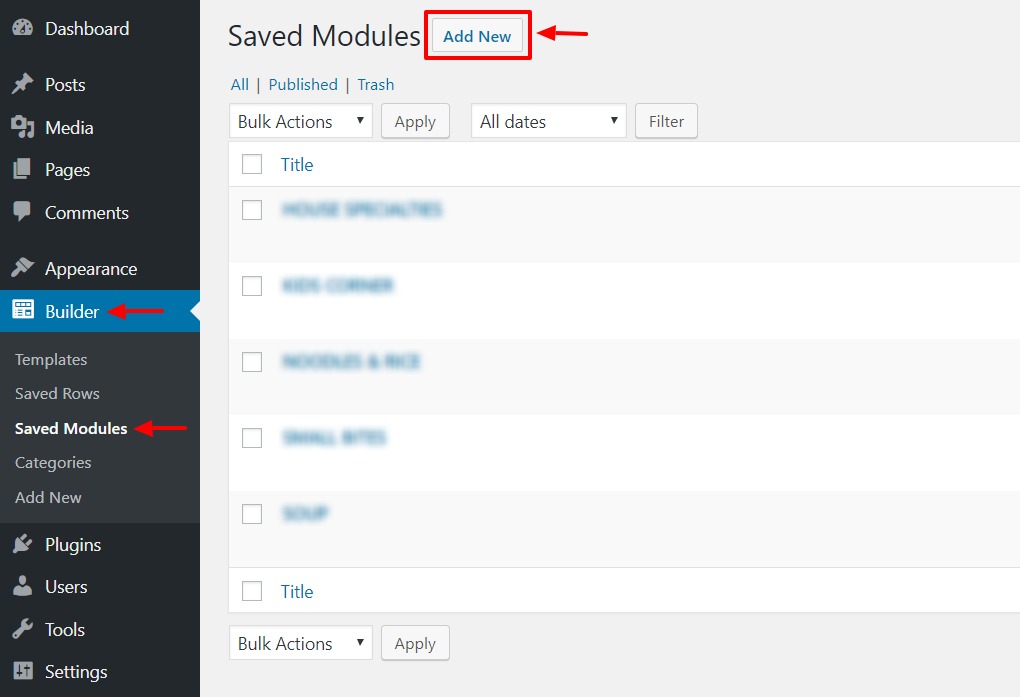
To create a new menu, go to WP Admin > Builder > Saved Module > Add New.
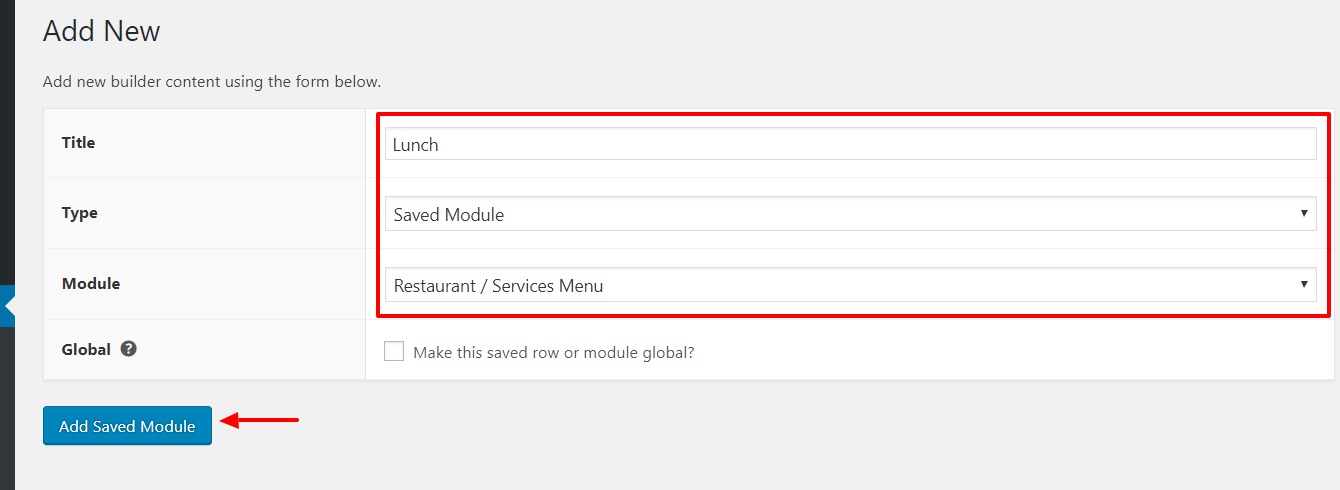
Enter the Title of the for the module (It can be your menu category name). Select the module – Restaurant / Services Menu module. Once done, click on the Add Saved Module button. On the next page, click on the “Launch Page Builder” button to begin editing.
Alternate way: You can create a page and drag and drop the module there, and once you are done editing, you can save the module by clicking on the “Save as…” button in module settings.
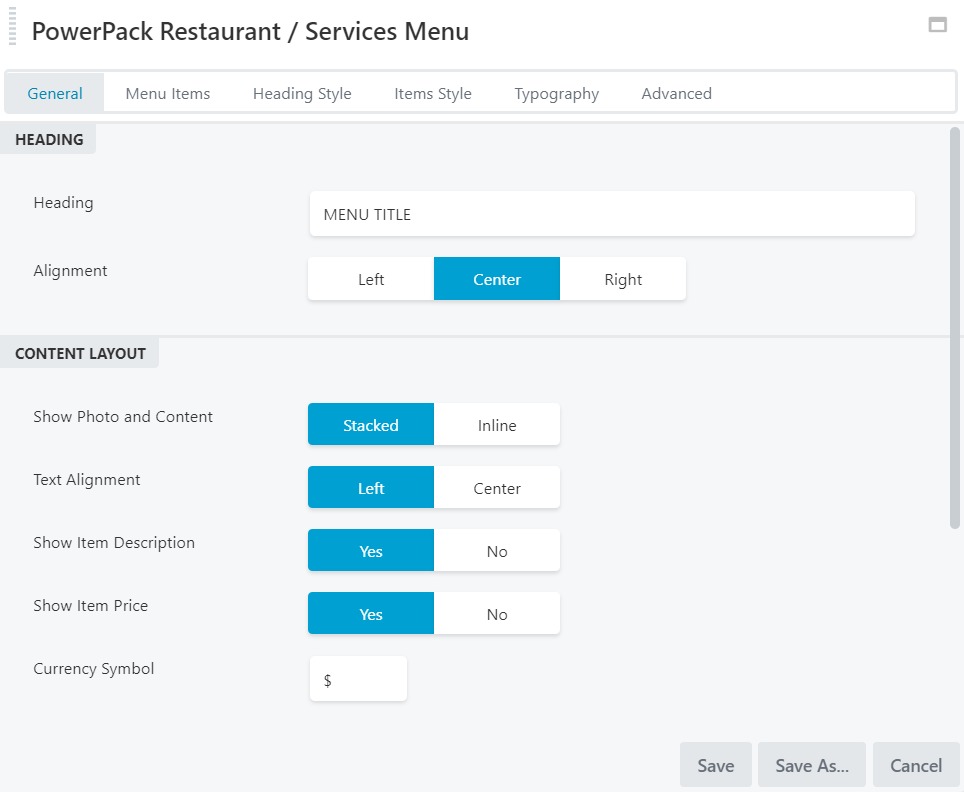
Now comes the editing and designing part, you can do it by adding items and then giving them a proper title, description, etc. You can change the way your menu look as well with the help of heading style, Item style, and typography tab.
Learn more about the Restaurant Menu module here.
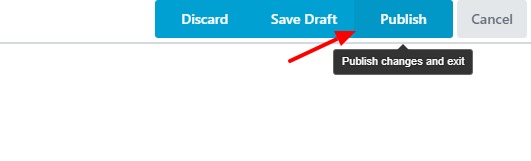
Once you are done, click on the Done button on the top right corner of the page and then click on Publish to make the changes live.
Do the same for other menu categories as well. Remember to give them unique names.
Now, at this point, we are done with the menus. Now we need to link them together on the Menu page using the Advanced Tabs module. For that, simply go to your menu page (if you have one) or you can create a new page.
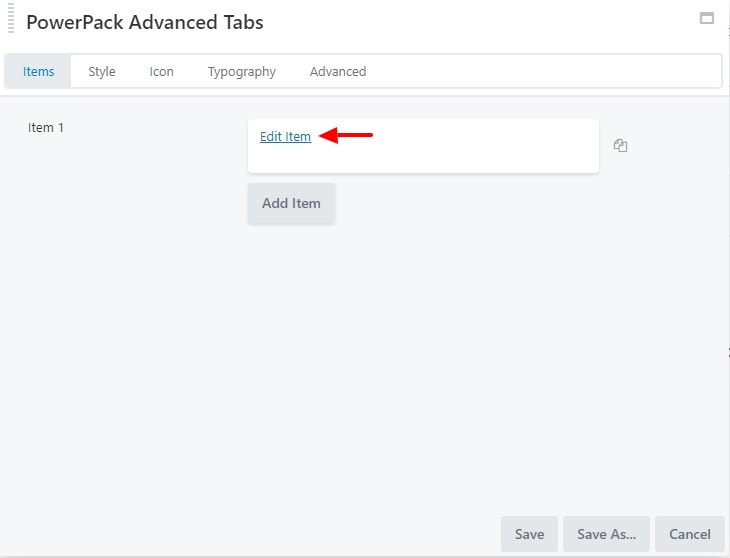
Open the page in the Page Builder mode and just drag and drop the Advanced Tabs module on the page. When the settings show up, click on the Edit item option link.
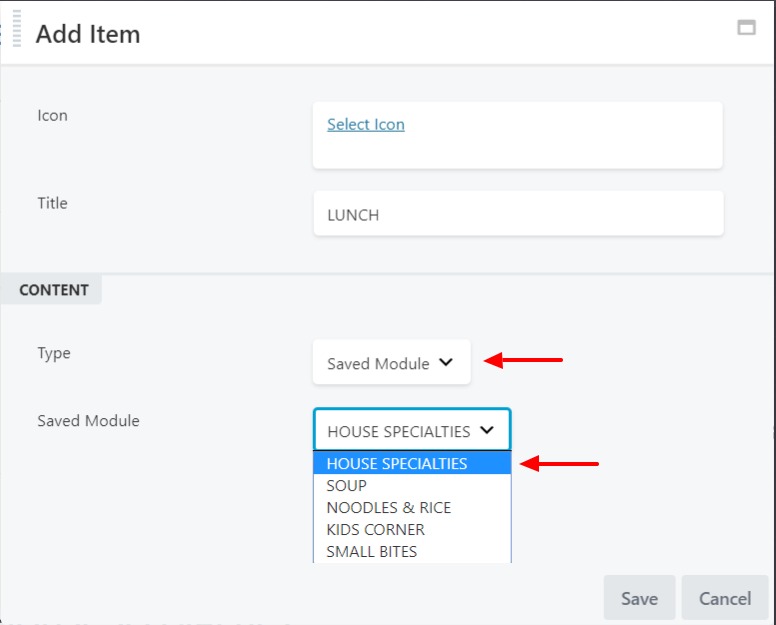
When the Add item window opens up, give it a name and then select the content type as Saved Module and simply select the respective module from the list. Click Save.
Repeat the same steps for the remaining menu categories and click on the Save button when done.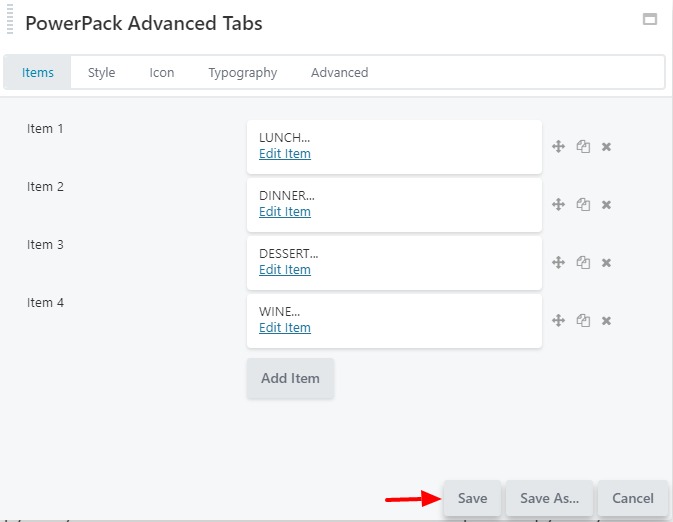
Voila! You have successfully created a functional and impressive restaurant menu! You can make numerous styling changes according to your website’s theme using the style and typography options.
This is what the Menu would look like once done:

Get PowerPack for Beaver Builder
Start building beautiful sites in record time with PowerPack & Beaver Builder. Get 50+ Modules and 250+ Templates with the PowerPack add-on for Beaver Builder. Get it here!
A few more interesting posts →

PowerPack Beaver Addons
Start creating beautiful websites with 65+ modules and 350+ templates for Beaver Builder.