How to Create a Custom Footer with Beaver Builder Lite
Last updated October 14, 2020 · Yashwardhan Rana
Are you looking for a simple way to customize the footer of your Beaver Builder website? You have landed on the right page. In this tutorial, I will show you how to create a custom footer with Beaver Builder and PowerPack addon.
Every part of the website matters a lot. Even the small parts that the section that often goes unnoticed like the footer section plays a big role.
If you have a well-designed footer, it can act as a major navigation point for your visitors. You can place all the relevant and important links of your website in a well-organized manner in your footer.
Although it is such an important region, we usually don’t get many options with the themes to customize the footer.
But is that it? Does that mean if one needs to customize the footer, they need to code their way?
Definitely not!
With advanced page builders like Beaver Builder, you can customize the footer of your website with simple drag and drop actions.
Now, there are two ways to do this.
If you have Beaver Themer, you can use it to customize every part of the website like, the header, footer, or the sidebar.
You can check here how you can customize the Footer of your website using the Beaver Themer.
How to Create a Custom Footer with Beaver Themer
But! If you do not have Beaver Themer, you can still customize parts of your website easily with the help of PowerPack for Beaver Builder.
PowerPack comes with a creative header/footer builder that allows you to create a custom design for your website’s header and footer.

In this tutorial, we will see how you can create a custom footer design for your website with Beaver Builder Free version and PowerPack Pro addon.
If you would rather watch a video of the same tutorial, you can check this video:
Creating a Custom Footer with Beaver Builder
For this tutorial, we will be using the Beaver Builder lite plugin and the PowerPack Pro addon, make sure you have both the plugins installed and activated on your website.
You can get these two plugins here:
Let’s begin designing our footer.
Step 1: Creating A New Page
The first thing you need to do is to create a new page.
Step 1.1: Go to WordPress Admin Dashboard and add a new page by going to Pages > Add New. Give your page a proper name like “Website Footer” or “My Footer”.
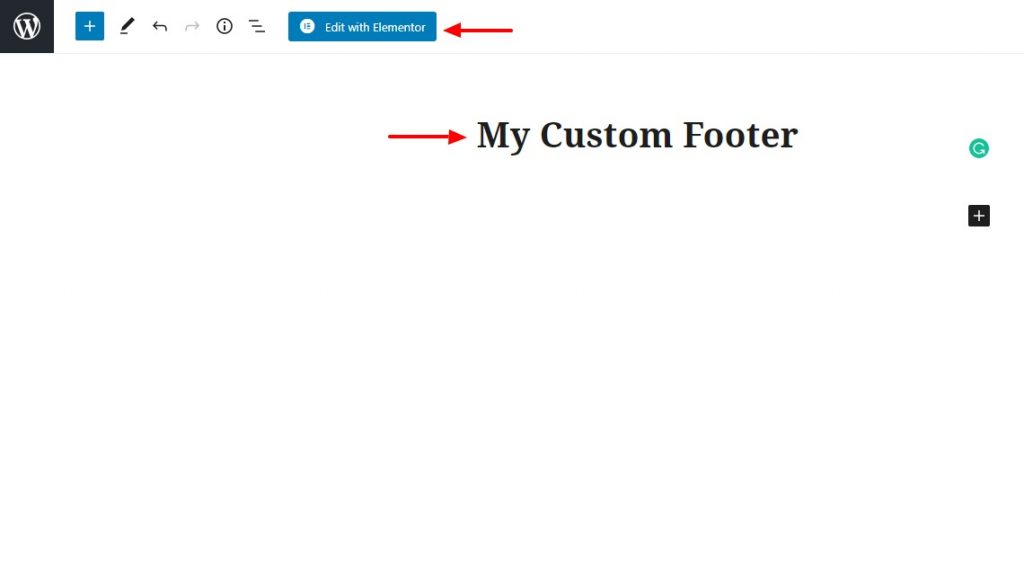
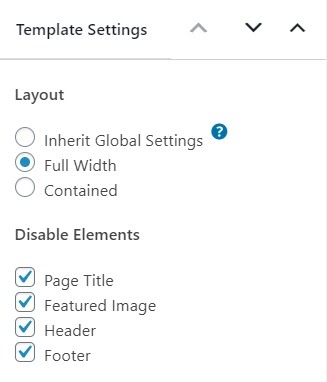
Step 1.2: Now, we need to make sure this page is blank and does not have any sidebars or footers of its own. So go ahead and disable the sidebars or select the page layout as a canvas.
Step 1.3: Once you are done making changes, click on the Launch Beaver Builder button.
Step 2: Designing the Footer with Beaver Builder
In this section, we will be creating our website’s footer. If you have a specific design you want to give your footer, you can make the same using the Beaver Builder. I am going to create a design that will look like this:

Step 2.1: Since I will be adding 4 separate areas in my Footer, I am going to add a 4 column layout. Simply drag and drop it on the page.
Step 2.2: Once you have added the layout, start adding the modules on the page. In the first column, I will add the site logo and a text block below that. You can adjust the width of the columns to fit the logo and text area accordingly.
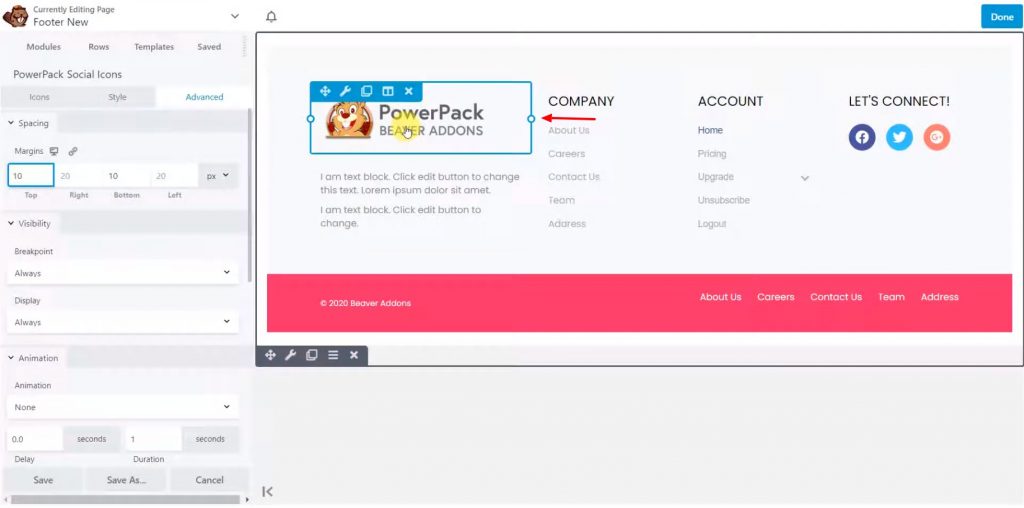
Step 2.3: Let’s add a few menus or links that can work as functional navigation points for the visitors. In one column I will be adding links about the company and in the next column, I will add links for the user accounts. Go ahead and add the respective menus or list. You can customize the text and styling of these two columns from the settings easily.
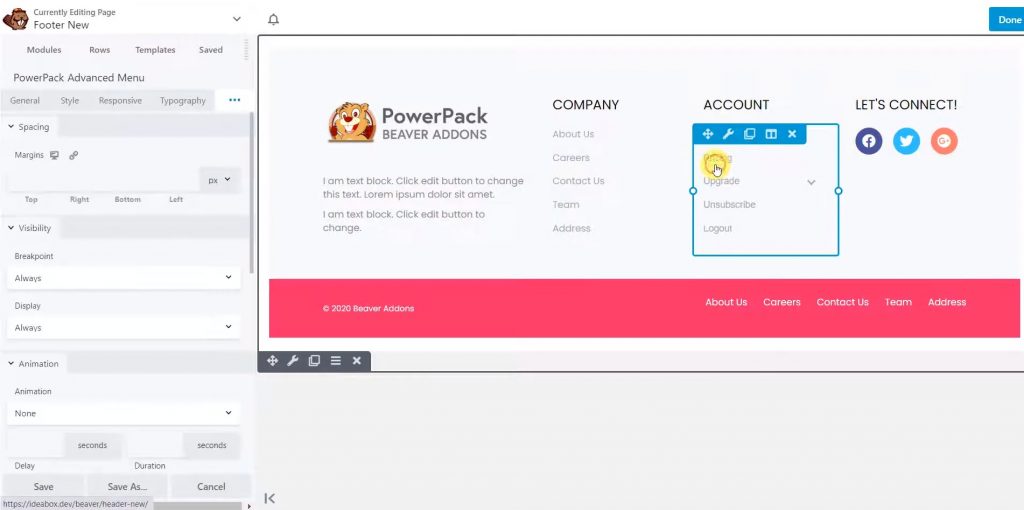
Once you are done, we will add items to our last column.
Step 2.4: In the last column, I am going to add social media icons. For this, simply drag and drop the social share module of PowerPack and add the respective links to the social icons.
Now if you want you can add another section at the bottom which can have the copyright details of the website or any other links or details.
After making the changes, this is what the final design looks like:

Step 2.5: Once you have made all the changes, simply publish the page.
Now we just need to set the page as our website’s footer.
Step 3: Setting Up the Footer
Step 3.1: Go back to your WordPress admin page and go to Settings > PowerPack. Now go to the Header/Footer Builder tab.
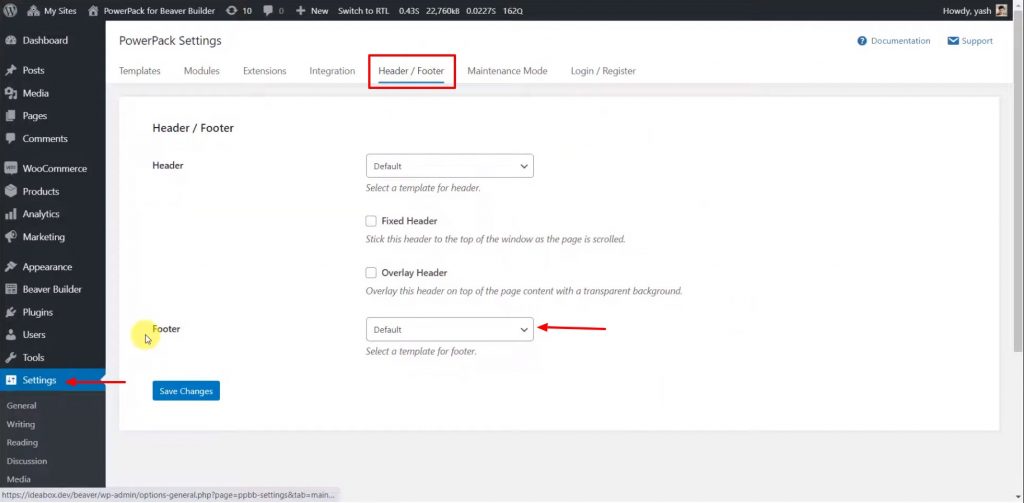
Step 3.2: In the Header/Footer Builder tab, you will see the footer option set as default. You simply need to change the default option to the page you have just designed. Click on the drop-down list and select the page you have designed recently.
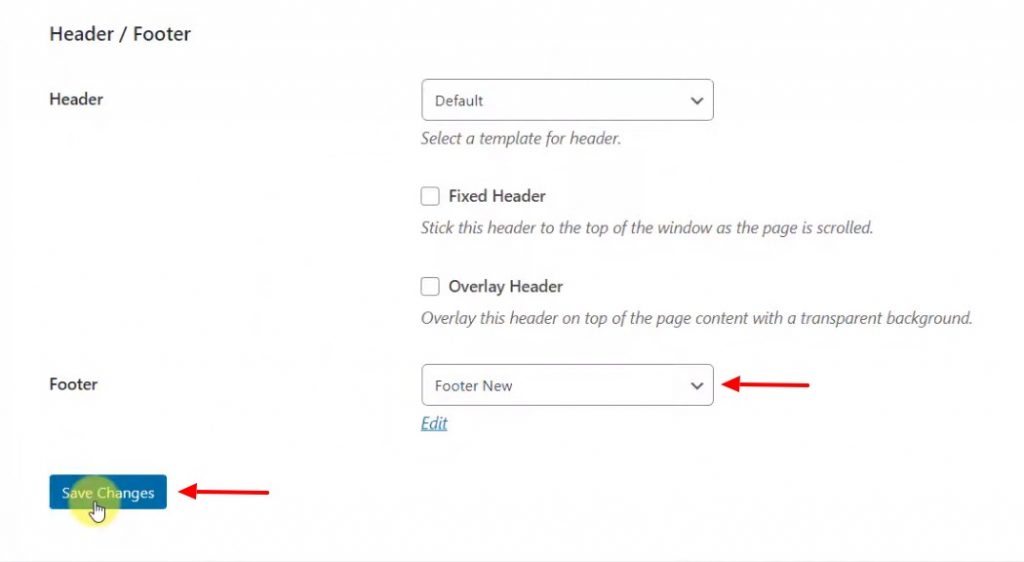
Once selected, click on the save changes button.
Your website’s footer will be live. Simple as that. 🙂
If you wish to make changes to the footer, simply make the changes to the page you have set as the footer and the changes will be applied sitewide.
Winding it Up!
With the Header/Footer builder of PowerPack addon, you can easily create custom footers and headers for your website with the Beaver Builder free/pro version.
Header/Footer builder is one of the many features of PowerPack. You get 100+ amazing and creative modules along with hundreds of professionally designed Beaver Builder templates. You can get all of this with the PowerPack Addon for Beaver Builder today!
If you found this tutorial useful, do share the love!

That is very useful.
Can we use BB to make a sticky row on the website?