[How to] Add an Announcement Bar to your Website using Beaver Themer
Last updated November 14, 2017 · Yashwardhan Rana

Beaver Themer addon gives you the freedom to fully design your WordPress website by using Beaver Builder.
The best thing about the Themer is that it is super easy to use. You do not need any coding knowledge requirement or any formal training to use it. It uses the same BB page builder editor which means you can just drag and drop a module and BB will take care of the coding part.
Checkout our Complete Beginner’s guide to Getting Started with Beaver Themer.
Before we begin, make sure you have the Beaver Themer, as well as the Beaver Builder Plugin, installed on your website as Beaver Themer is an addon to the original page builder so we will need both of them installed and ready to go.
How to add an Announcement Bar to your Website using Beaver Themer?
The holiday season is here and it’s time for offers! You can use this announcement bar to display offers, product launches, subscription form or any other important information.
To make an announcement Bar at the top of the page, we will be using Theme Parts. Using Theme Parts will give us the freedom to restrict the announcement bar from specific users, pages and also allows easy alteration. Let’s see how we can do it.
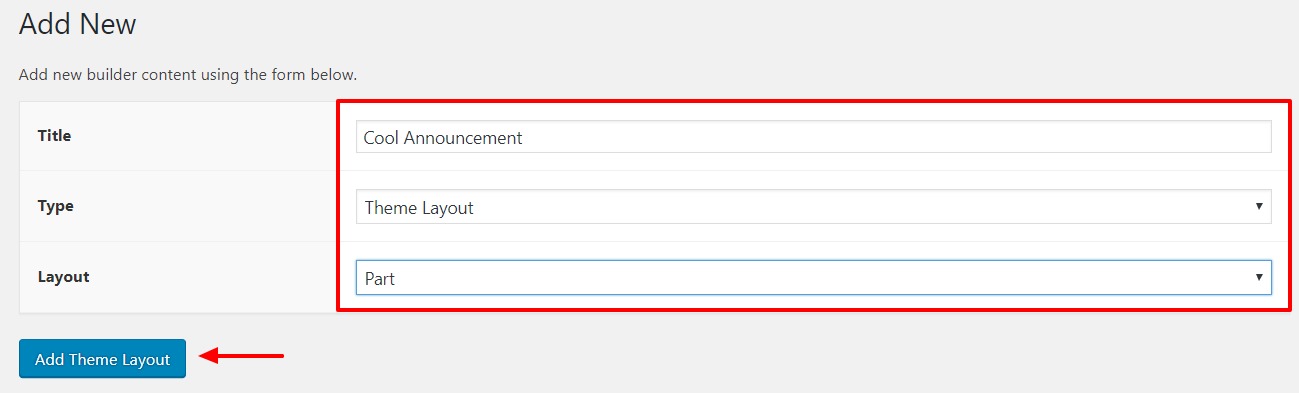
Step 1: We need to create a new theme layout. Go to WP Admin > Builder > Add new to add a new layout.

Step 2: Give your Announcement bar a name and then select the Type as Part. Click on the Add Theme Layout button.
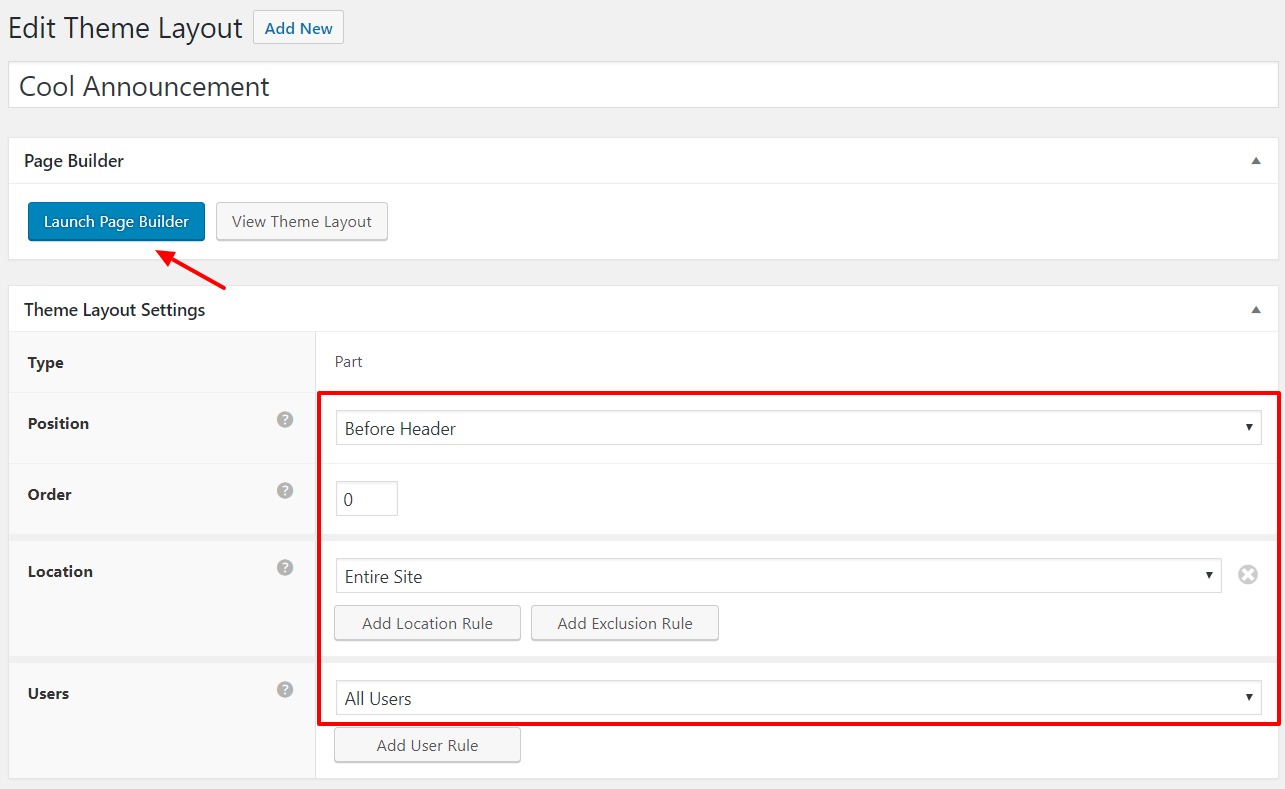
Step 3: Now, select the position, location, and users for the Bar. Here we want our bar to reach the maximum audience, so we have selected location as entire site and users as all users. Since we want the position to be at the top of the header, choose “Before Header” from the list. Publish your changes and click the “Launch Page Builder” button.
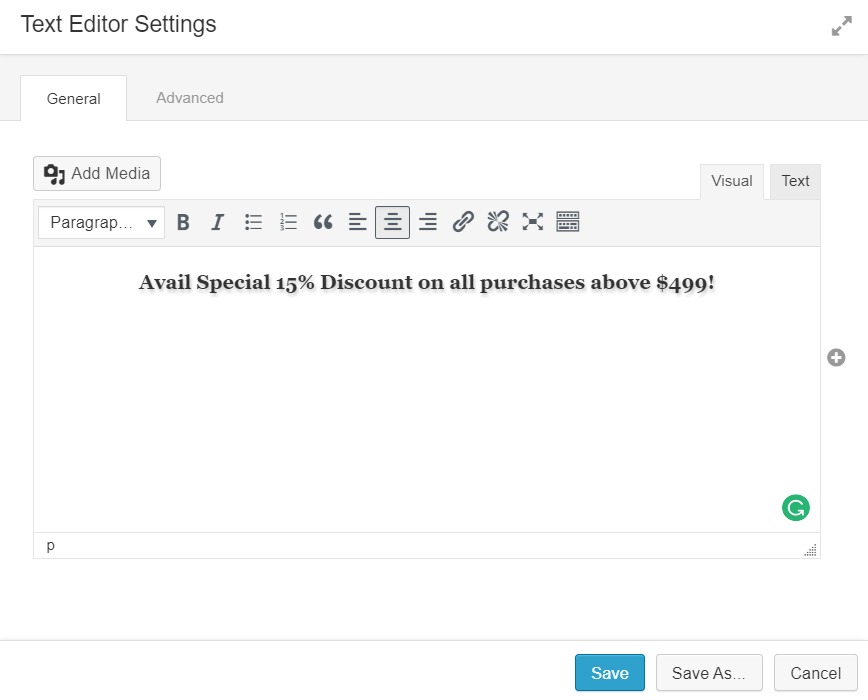
Step 4: Now drag and drop a Text Editor module in the space provided and enter the text there with the necessary links, if needed. Once you have made the changes, click on the save button.
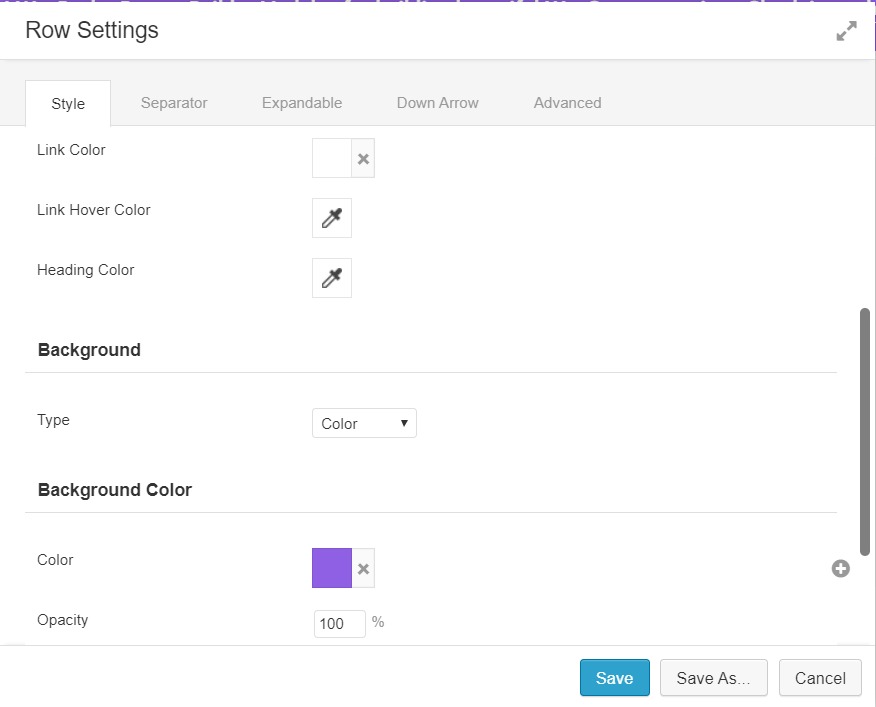
Step 5: Go to the row settings and change the background color, text color according to your need. You can also change the margins and padding to zero or any other value so the text editor will fit perfectly with the header below it. Here are the changes that we have made.
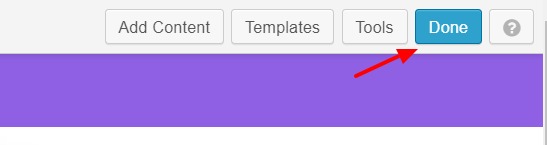
Step 6: Once you have made all the changes, click on the Done > Publish Changes button to make all the changes live.
This is the result of the text, background, and changes that we made.

There are many other things you can add to the Header like CTA button, Subscription form, etc. that will complement the header as well as increase the functionality.
Also Read: How to Create a Custom Header Layout with Beaver Themer.
2x your sales with Social Proof & Urgency:
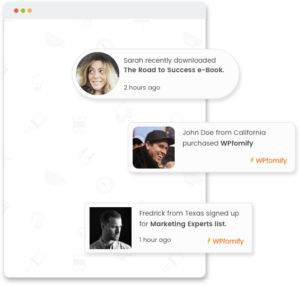
You can use WPfomify (our new product) to display a special announcement bar with a countdown timer to create urgency.

Not only this, display real-time customer activity on your WooCommerce store to generate more sales with social proof.
WPfomify has integration with popular plugins like:
- WooCommerce
- Easy Digital Downloads
- GiveWP
- LifterLMS
- Check out complete list here
Special Offer:
Get 20% OFF on WPfomify with BEAVER20 discount coupon. Get WPfomify and increase your conversions!
A few more interesting posts →
3 Comments
Leave a Comment

PowerPack Beaver Addons
Start creating beautiful websites with 65+ modules and 350+ templates for Beaver Builder.
This is no longer supported in version 1.2.3
We bought the Pro version and it seems all functionality got strip out to force us to buy powerpack. Is it true?
Are you referring to the Pro version of Beaver Builder?
If you are not seeing the modules, you can check WP admin > Settings > Beaver Builder > Modules page and make sure everything is active there.